
If you have been around the world of mobile app development, you should know by now that Flutter is here to stay. According to its official website, Flutter is “an open source framework by Google for building beautiful, natively compiled, multi-platform applications from a single codebase”. After tenths of broken promises of “code once, run anywhere” from Phonegap, Cordova, Xamarin, and React Native, finally, there is a cross-platform alternative that can compete with native development.
You may fall into the temptation of taking this new shiny technology for a ride, then you go to the official documentation and learn that Futter uses Dart, a language you probably have not used before. It also requires installing Android studio and some CLI tools that need to be run just to have a base project to work with.
This tutorial helps you to learn the basics of Flutter without having to spend hours installing tools and reading countless pages of documentation.
Prerequisites
- You are a capable developer in any modern programming language.
- You understand how to code the User Interface of your application (it could be desktop, web frontend, mobile, games, etc.).
You will feel at home in this tutorial if you are a JavaScript/React.js developer, as we are going to use it for comparison because it has a lot of similarities with Flutter. If instead, you come from Java, Swift, or C# world, you also would feel fine because Dart is closer to the OOP paradigm than JavaScript.
Flutter is a Software Development Kit that uses Dart language, so do not worry if the syntax is sometimes weird for you. For this tutorial, we are just going to highlight a few Dart features. If you want to learn more, Dart documentation has a specific section dedicated to introducing you to the language if you come from JavaScript:
https://dart.dev/guides/language/coming-from/js-to-dart
First, Dart main() is a pre-defined method that works as the entry point of the application. So let’s write a Hello world in Dart. As promised, we will not be installing any tools, we can run Dart code on this nice website:
I know you probably are a great developer, but just out of tradition, let’s output write a classical “Hello World” to the console:
void main() {
 print("Hello world");
}
It feels good, doesn’t it? We start to feel the power of having a dart in our programming tool belt. But we also want to flutter in the air with our newly acquired darts to create awesome apps, so let’s jump to flutter right now!
Importing libraries on Dart is super easy, the following line imports the material library from the flutter package and that is all we need for this tutorial.
import 'package:flutter/material.dart';
For defining the UI in a way that is dynamic, reactive, and modular Flutter uses Widgets. These building blocks can contain other Widgets, respond to user interaction and have some state associated with them. They are almost the same as React’s components.
We will create a new class for our first widget, I’ve named it PresentationCard, this class should inherit from the StatelessWidget class. It has different methods called during its life cycle, one of the most important is build(), we are going to override it with our own implementation so this widget behaves and looks like a dynamic presentation card. We can do that with the following code:
class PresentationCard extends StatelessWidget {
@override
Widget build(BuildContext context) {
// This method returns an object of the type Widget
}
}
One great thing about Flutter is that “it comes with batteries”, by that I mean you will have a lot of helpful and professional widgets and classes to use on your app. One of them is the Scaffold class.
It acts as a top-level container that can help you correctly present a screen title, floating buttons, or navigation bars. We are going to use just the appBar and the body properties, but if you want to know more about this class, check out the official documentation:
https://api.flutter.dev/flutter/material/Scaffold-class.html
alking about containers, there is one very important for our app, MaterialApp . It “wraps a number of widgets that are commonly required for material design applications”. If instead of Material design you want to use the iOS design system, you would use CupertinoApp.
Let’s put all of this together in the following way:
void main() {
 runApp(
   MaterialApp(
     home: PresentationCard(),
   ),
 );
}

class PresentationCard extends StatelessWidget {
 @override
 Widget build(BuildContext context) {
   return Scaffold(
     appBar: AppBar(
       title: const Text('Presentation Card'),
     ),
     body: const Text('Hello Flutter World!'),
   );
 }
}
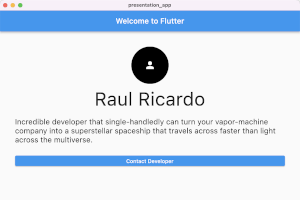
Easier than saying hocus-pocus, there you have it your first Flutter app, running without installing anything on your computer. There are a couple of things worth noting in the previous code. First, the runApp method. According to the docs, it “Inflate the given widget and attach it to the screen”. For now, I recommend you think of it, as the main function required not by Dart but by Flutter. You also spotted that we used the Text widget, right? As you might expect, it is used to display text on the screen.
This should look to you as familiar if you come from the React world, as it does strange if your background is from a more classical approach, where you define the UI completely separated from the behavior instead of this Widget tree and then you manage the control flow programmatically.
Flutter and React follow a declarative programming approach that has proven helpful for defining User Interfaces that should react to different events (User Interaction, fetching information, real-time communication, etc.) immediately and efficiently. So much that even Apple adopted it on their platforms to this declarative approach with SwiftUI.
We can use more of this declarative approach and the widgets provided by flutter to make our app look better:
class PresentationCard extends StatelessWidget {
 @override
 Widget build(BuildContext context) {
   return Scaffold(
     appBar: AppBar(
       title: const Text('Welcome to Flutter'),
     ),
     body: Center(child: MyList()),
   );
 }
}

class MyList extends StatelessWidget {
 @override
 Widget build(BuildContext context) {
   return ListView(
       padding: const EdgeInsets.all(40),
       children: const <Widget>[
         CircleAvatar(
           maxRadius: 50,
           backgroundColor: Colors.black,
           child: Icon(Icons.person, color: Colors.white, size: 30),
         ),
         Center(
           child: Text(
             'Raul Ricardo',
             style: TextStyle(
               fontSize: 50,
             ),
           ),
         ),
         Text(
           "Incredible developer that single-handled can turn your vapor-machine company into a super stellar spaceship that travels across faster than light across the multiverse.",
           style: TextStyle(
             fontSize: 20,
           ),
         ),
       ],
     );
 }
}
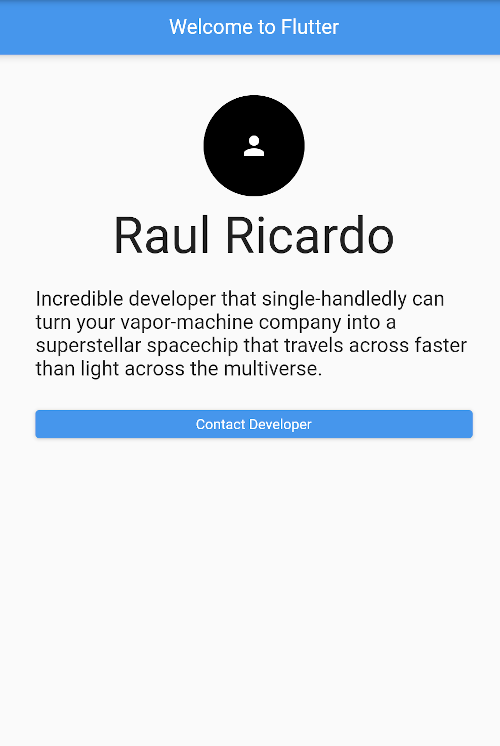
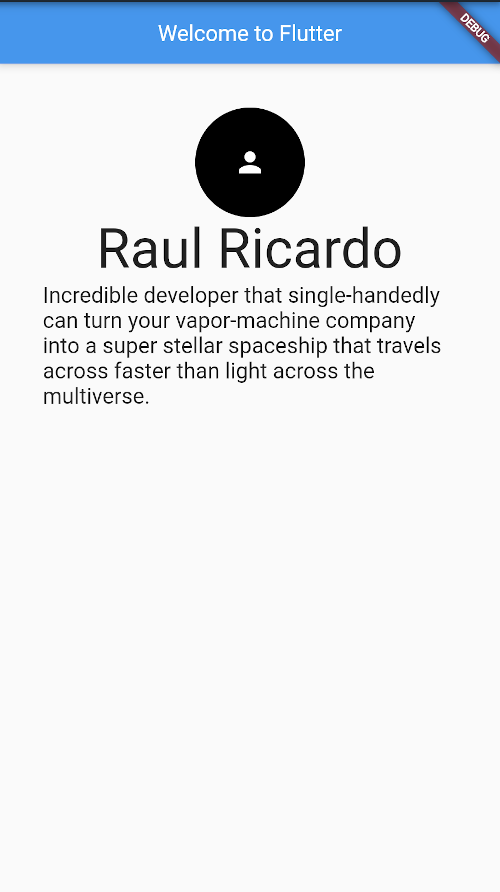
Lists (or TableViews) are very popular on mobile applications, they usually present the same kind of information multiple times, like the Contacts app on your phone. Here we used a list in a slightly different way to show an icon, a title, and a description. For that, we sent an array of widgets (CircleAvatar, Center and Text), and flutter did the rest.
This looks nice but does not have any interactivity at the moment. Let us add a button to our widget tree that will take the user to another screen. For that, we will use the ElevatedButton widget. We want it to be at the same level of hierarchy as our “Incredible developer…” text, so write a comma after it to add the ElevatedButton as a new child of our ListView.
...
   const Text(
   "Incredible developer that single-handledly can turn your vapor-machine company into a superstellar spacechip that travels across faster than light across the multiverse.",
   style: TextStyle(
       fontSize: 20,
   ),
   ),
   ElevatedButton(
   child: const Text('Contact Developer'),
   )
...
If we try to run this, DartPad will inform us of an error:

As you can see, some widgets have required parameters. For ElevatedButton you need to specify the action handler. This is true even for a disabled button, in that case, you can just use null as the parameter.
For simple actions, it is common to have the handler nested inside the Widget:
   ElevatedButton(
       child: const Text('Contact Developer'),
       onPressed: () {
           print("Navigate to next screen");
       }
   )
But maybe you do not want to clutter too much your widget tree or that action can be reused by different widgets. In that case, you can also define it as a method of your class:
void _pushSaved() {
  print("Navigating to next screen");
 }
Note that we started the method name with an underscore. This marks the method as private with an important difference from traditional OOP languages: Privacy in Dart exists at the library, rather than at the class level. At the moment we are not using different libraries, but it is important you have the subtleties of Dart in mind for when you work on large projects.
You can check in the console that our button is working. However, it seems to be very close to the text. In flutter, we have widgets for many functionalities. We can use SizedBox to create some spacing between those two widgets.
import 'package:flutter/material.dart';

void main() {
print('hello world');
runApp(
   MaterialApp(
     home: PresentationCard(),
     debugShowCheckedModeBanner: false,
   ),
 );
}

class PresentationCard extends StatelessWidget {
 @override
 Widget build(BuildContext context) {
   return Scaffold(
     appBar: AppBar(
       title: const Text('Welcome to Flutter'),
     ),
     body: Center(child: MyList()),
   );
 }
}

class MyList extends StatelessWidget {
 @override
 Widget build(BuildContext context) {
   return ListView(
       padding: const EdgeInsets.all(40),
       children: <Widget>[
         const CircleAvatar(
           maxRadius: 50,
           backgroundColor: Colors.black,
           child: Icon(Icons.person, color: Colors.white, size: 30),
         ),
         const SizedBox(height: 10),
         const Center(
           child: Text(
             'Raul Ricardo',
             style: TextStyle(
               fontSize: 50,
             ),
           ),
         ),
         const SizedBox(height: 20),
         const Text(
           "Incredible developer that single-handledly can turn your vapor-machine company into a superstellar spaceship that travels across faster than light across the multiverse.",
           style: TextStyle(
             fontSize: 20,
           ),
         ),
         const SizedBox(height: 30),
         ElevatedButton(
           onPressed: _pushSaved,
           child: const Text('Contact Developer'),
         ),
       ],
     );
 }
void _pushSaved() {
  print("Navigating to next screen");
 }
}
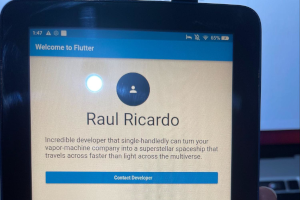
Congratulations! You have learned some important Dart and Flutter concepts, and have seen your code run on the web. In the next part of this tutorial, we will learn how to navigate to a different screen, add more widgets, and run our app natively on a mobile device. Sounds amazing, doesn’t it? If you want the complete code of this tutorial, you can find it here.