Introduction
In our previous tutorial, we learned how to add one unit test to our iOS project. But in real-world projects, you need to test multiple layers of your project. And sometimes even provide some metrics about the coverage of code that your tests provide.
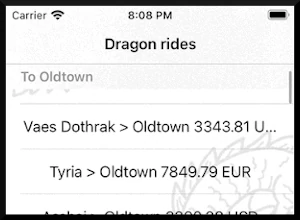
In this second part, we will continue creating Unit Tests for a project that uses MVP (Model, View, Presenter). This is one of the most used presentational patterns because it addresses a major problem Apple’s implementation of MVC has: putting too many responsibilities in the ViewController, to the point that MVC seems to stand for Massive View Controller instead of Model View Controller.
Prerequisites
- You are comfortable coding in Swift for the iOS platform.
- You have some understanding of how the MVP pattern works.
- You know how to add Unit Tests to your Xcode project (if you are not familiar with this, I recommend you check the first part of this tutorial: https://www.turtle-techies.com/adding-unit-tests-to-an-ios-mvp-project-in-swift/
Testing the Presenter and the View Controller
We are going from the most abstract layers (Models and Services) toward the layer in charge of the User Interface (View Controllers). In a real-world project, I think this approach is preferable to the opposite direction because this allows us to first add tests to the shared components used through our app. The User Interface changes more quickly than other components. Also, the code of the View Controllers is specific to one scene or screen of your app. So it makes sense to improve the quality of the foundations of our app first.
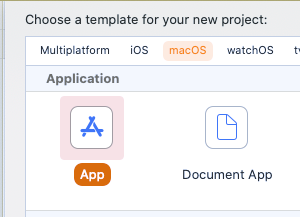
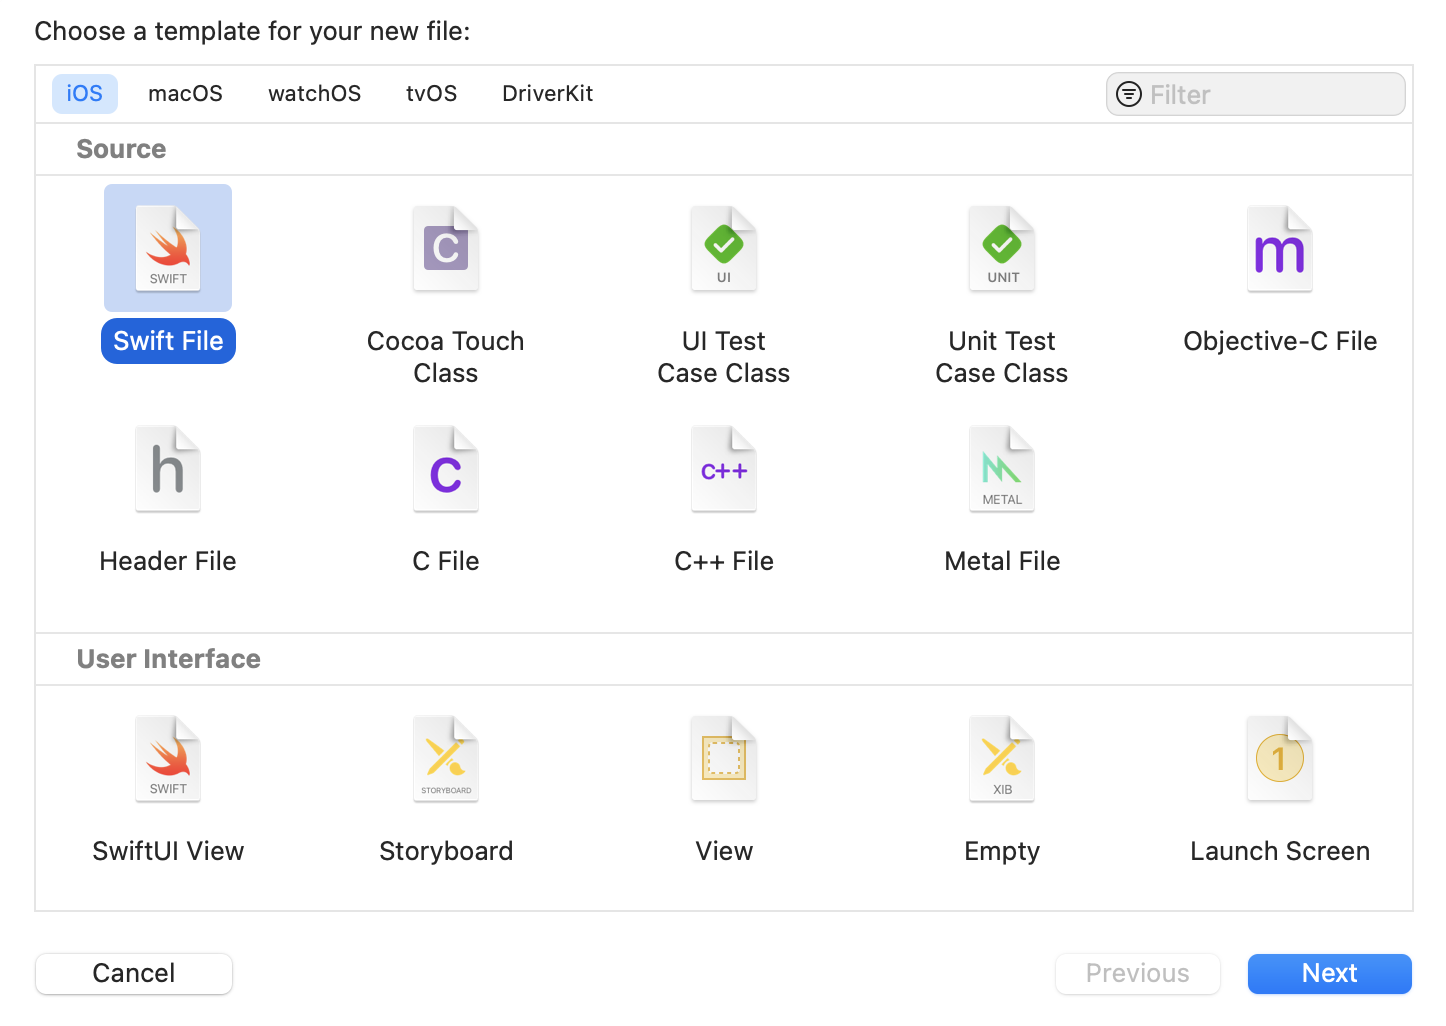
Right Click on our Unit Test folder > New File > Unit Test Case Class.

I named this file ListFlightsPresenter_UnitTests.swift, but you can use a different name. In this class, our System Under Test is ListFlightsPresenter, so it is the only actual implementation we are going to use. The other modules that interact with it will be just mock objects like a MockFlightsService and a MockListFlightsVC.
Let’s create those new files as Swift files inside the Mocks folder.
For now, just create the classes and conform to their correct protocols.
MockFlightService.swift file
import Foundation
@testable import Dragon_Riders

class MockFlightsService: FlightsServiceProtocol {

    func getFlights(completion: @escaping FetchResultCallback<FlightResponse>) {
            //Mocked service request
    }

}


MockListFlightsVC.swift file

import Foundation
@testable import Dragon_Riders


class MockListFlightsVC: ListFlightsView {
    func flightsLoaded(flights: [Flight]) {
        // Process flights.
    }

    func presentErrorMsg(messageText: String) {
        // Show error message.
    }

}
When we are developing a feature, usually we are most concerned with making it work, so once we do that, we feel the work is done. That causes failing cases to not receive the attention they require. Unit Tests are useful to make sure failing scenarios are handled correctly.
Add the following code to your ListFlightsPresenter_UnitTests.swift file:
class ListFlightsPresenter_UnitTests: XCTestCase {

    var subject: ListFlightsPresenter!
    var mockFlightsService: MockFlightsService!
    var mockListFlightVC: MockListFlightsVC!

    override func setUpWithError() throws {
        // Put setup code here.
This method is called before the invocation of each test method in the class.
        super.setUp()
        subject = ListFlightsPresenter()
        mockFlightsService = MockFlightsService()
        subject.flightsService = mockFlightsService
        mockListFlightVC = MockListFlightsVC()
        subject.attachView(mockListFlightVC)
    }

}
We will code our MockFlightService in a way that we can make it return successful or failing responses. We might consider making actual requests to the server API. The problem with this approach is that it can have a lot of unexpected situations, like connectivity problems, changes in the API, authentication, etc.
When writing unit tests, we should have in mind what is the actual Subject Under Test, so we can simplify the parts related to the SUT and focus only on the actual behavior we want to test.
One option for doing this in our case is to add a local JSON with test data so we can unit test our presenter without caring at all about network requests.
I just took a fragment of the JSON file the server returns and saved it locally. You can create it manually with the following content.
flights.json file
{
   "results": [
       {
           "inbound": {
               "airline": "Viserion",
               "airlineImage": "http://dragonimages.net/images/gallery/dragon-images-by-unknown-250.jpg",
               "arrivalDate": "8/9/2994",
               "arrivalTime": "17:24",
               "departureDate": "7/10/2993",
               "departureTime": "4:57",
               "destination": "Lannisport",
               "origin": "Lorath"
           },
           "outbound": {
               "airline": "Vhagar",
               "airlineImage": "http://dragonimages.net/images/gallery/dragon-images-by-unknown-244.jpg",
               "arrivalDate": "1/15/3052",
               "arrivalTime": "23:31",
               "departureDate": "11/10/3049",
               "departureTime": "9:26",
               "destination": "Lorath",
               "origin": "Lannisport"
           },
           "price": 7857.72,
           "currency": "GBP"
       },
       {
           "inbound": {
               "airline": "Archonei",
               "airlineImage": "http://dragonimages.net/images/gallery/dragon-images-by-unknown-222.jpg",
               "arrivalDate": "5/8/2596",
               "arrivalTime": "19:51",
               "departureDate": "1/4/2592",
               "departureTime": "13:58",
               "destination": "Tyrosh",
               "origin": "Gulltown"
           },
           "outbound": {
               "airline": "Rhaegal",
               "airlineImage": "http://dragonimages.net/images/gallery/dragon-images-by-unknown-252.jpg",
               "arrivalDate": "4/6/2693",
               "arrivalTime": "20:20",
               "departureDate": "5/13/2684",
               "departureTime": "3:31",
               "destination": "Gulltown",
               "origin": "Tyrosh"
           },
           "price": 6236.57,
           "currency": "JPY"
       }
   ]
}
I like to put these files inside a folder named API that lives inside the Mocks folder. You can choose whatever location you want inside the Test target. Then add it to the project.
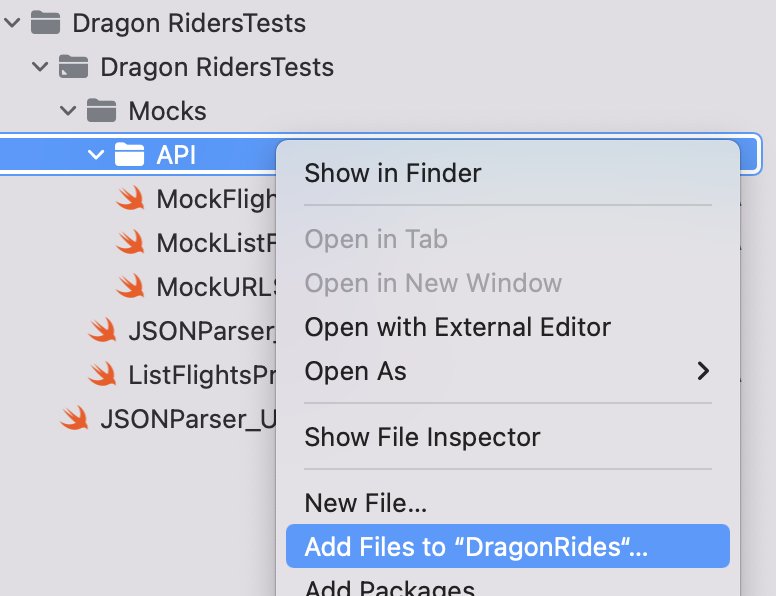
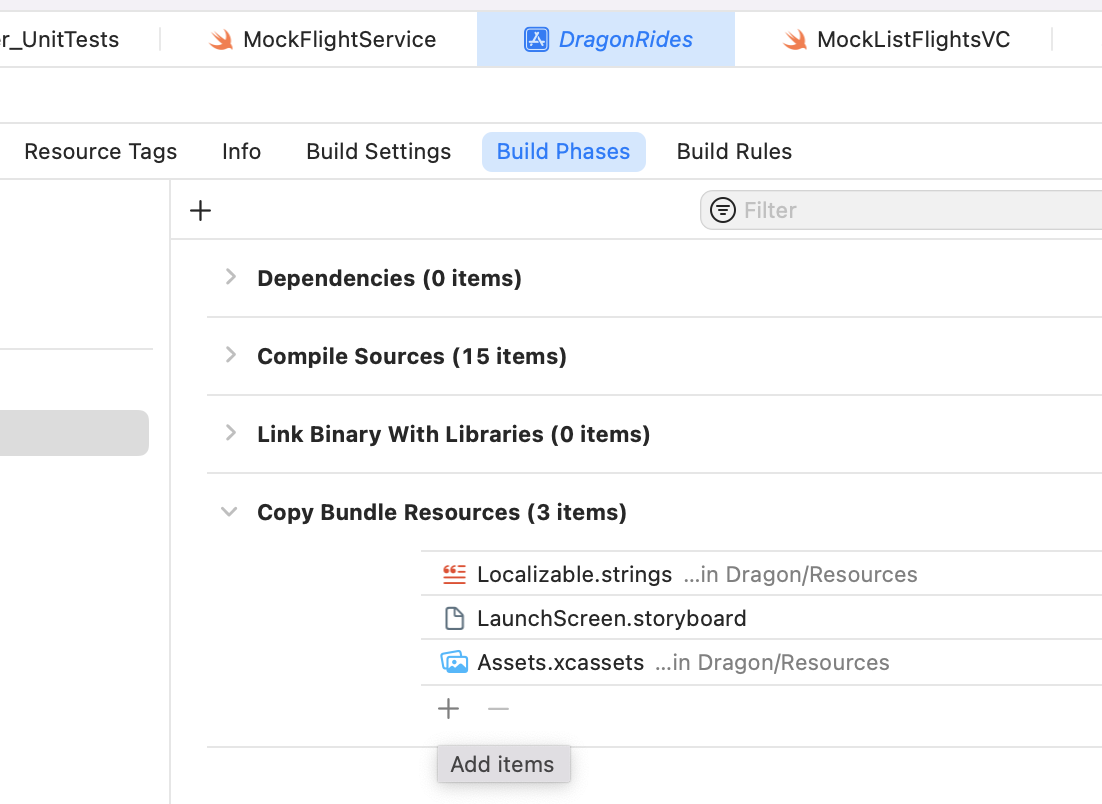
Although we already added to the sources of our project, to read it from our app, we need to add it to the bundle. To do that, follow the next steps:
- Click your project
- Click your target
- Select Build Phases
- Expand Copy Bundle Resources
- Click ‘+’ and select your file.
Alright! Now we just need to code successful and failing responses in our mock service. We can do that with the following code:
MockFlightService.swift
import Foundation
@testable import Dragon_Riders

enum ServiceError: Error {
    case getError(String)
}

class MockFlightsService: FlightsServiceProtocol {
    private let jsonParser = JSONParser(session: MockURLSession())
    var makeRequestFail = false

    func getFlights(completion: @escaping FetchResultCallback<FlightResponse>) {
        if makeRequestFail {
            completion(.failure(ServiceError.getError("Could not get flights")))
        } else {

            let jsonData = readLocalFile(forName: "flights")
            jsonParser.decodeJson(data: jsonData, completion: completion)
        }
    }


    private func readLocalFile(forName name: String) ->  Data  {
        do {
            if let bundlePath = Bundle.main.path(forResource: name,
                                                 ofType: "json"),
                let jsonData = try String(contentsOfFile: bundlePath).data(using: .utf8) {
                return jsonData
            }
        } catch {
            print(error)
        }
        fatalError("Could not read local json")
    }
}
As we said, testing failing cases is a valuable part of unit testing, so let’s create a test that verifies that when the request fails, the appropriate method in the view controller is called.
ListFlightsPresenter_UnitTests.swift
import XCTest
@testable import Dragon_Riders

class ListFlightsPresenter_UnitTests: XCTestCase {

    var subject: ListFlightsPresenter!
    var mockFlightsService: MockFlightsService!
    var mockListFlightVC: MockListFlightsVC!

    override func setUpWithError() throws {
        // Put setup code here.
This method is called before the invocation of each test method in the class.
        super.setUp()
        subject = ListFlightsPresenter()
        mockFlightsService = MockFlightsService()
        subject.flightsService = mockFlightsService
        mockListFlightVC = MockListFlightsVC()
        subject.attachView(mockListFlightVC)
    }

    func testFailingServiceTest() throws {
        mockFlightsService.makeRequestFail = true
        subject.getFlights()
        XCTAssertTrue(mockListFlightVC.presentErrorMsgCalled)
    }

}
Of course, it is helpful to add tests that also check a successful request in the presenter, but at this point you should be able to do that by yourself.
To finish the tutorial, we are going to add some example tests to our View Controller. Create a new Unit Test Case Class named ListFlightsVCUnitTest.swift.
When writing Unit Tests for View Controllers, I recommend not to rely on assertions that depend on visual aspects like checking text values or visibility of elements. For this kind of testing, you can use UI Tests. Instead, try to check if the relationship with the presenter is correct, and try to identify potential problems hard to detect with the naked eye, like unnecessary API requests. That is just what we do in the following file:
ListFlightsVCUnitTest.swift
//
//  ListFlightsVCUnitTest.swift
//  Dragon Riders UnitTests
//
//  Created by Andres Acevedo on 26/01/22.
//  Copyright © 2022 Andrés A.
All rights reserved.
//

import XCTest
@testable import Dragon_Riders

class ListFlightsVCUnitTest: XCTestCase {
    var subject: ListFlightsViewController!
    var mockPresenter: MockFlightsPresenter!
    override func setUpWithError() throws {
        super.setUp()
        subject = ListFlightsViewController()
        mockPresenter = MockFlightsPresenter()
        subject.presenter = mockPresenter
        subject.loadViewIfNeeded()
    }

    override func tearDownWithError() throws {
        // Put teardown code here.
This method is called after the invocation of each test method in the class.
    }

    // Using === we check that the presenter view controller is the mock we injected.
    func testPresenterBinded() throws {
        let presenterView = subject.presenter.listFlightsView
        XCTAssert(presenterView === subject)
    }

    // With this we test flightsLoaded function is called and
    func testCorrectNumberOfFlights() throws {
        XCTAssertEqual(subject.flights.count, 2) // There are two example flights in the JSON used for tests.
    }

    // This test can help us find unnecessary API requests.
    func testGetFlightsCalledOnceOnLoad() throws {
        XCTAssertEqual(mockPresenter.getFlightsTimesCalled, 1)
    }

}
In this class we need a mock presenter to isolate the SUT as the only module that uses the actual implementation of our app. Fortunately, it is easy for us to create a mock presenter that uses our previously created mock service.
MockListFlightsPresenter.swift
import Foundation
@testable import Dragon_Riders

class MockFlightsPresenter: ListFlightsPresenter {
    var getFlightsTimesCalled = 0

    override func getFlights() {
        print("get flights")
        getFlightsTimesCalled += 1
        let flightsService = MockFlightsService()
        flightsService.getFlights {
            [weak self] result in
            guard let self = self else {
                print("No self reference found")
                return
            }
            switch result {
            case .failure(let error):
                if error is DataError {
                    print("DataError = \(error)")
                } else {
                    print(error.localizedDescription)
                }
                self.listFlightsView?.presentErrorMsg(messageText: NSLocalizedString("api.error", comment: ""))
            case .success(let response):
                var flights:[Flight] = response.flights
                flights.sort {
                    $0.outbound.destination < $1.outbound.destination
                }
                self.listFlightsView?.flightsLoaded(flights: flights)
            }

        }
    }
}
This mock presenter just consumes a flights service and calls the flightsLoaded method in the view for a successful request, or presentErrorMsg for a failing request.
When you are creating your mock objects, you do not need to limit yourself to implementing the methods of the protocol. You can add special properties or methods useful for testing. Here, we added the getFlightsTimesCalled property, a counter that helps us to check how many times the service is consumed. Having in mind that HTTP requests are one of the slowest operations that an app usually performs, it is a good idea to have safety checks in this area.
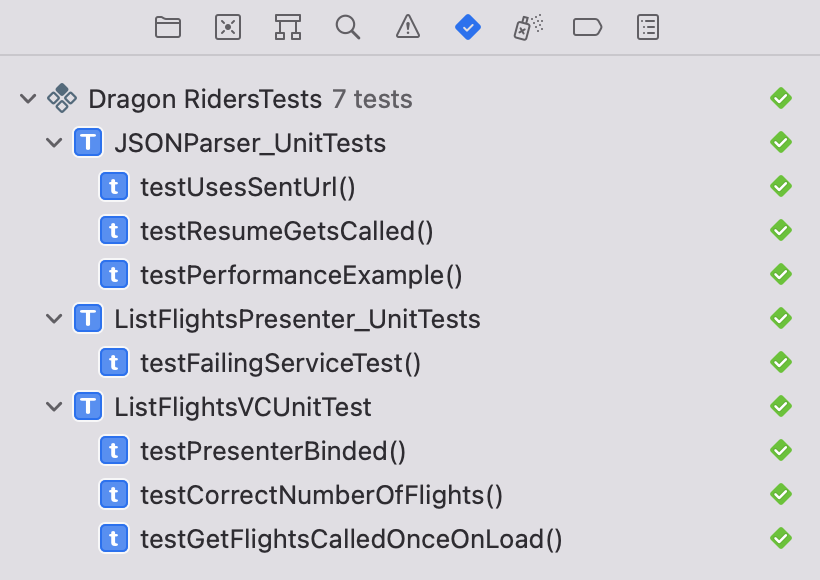
The moment has arrived. Our test suite for our MVP project is ready and willing to be run. Do that by clicking on Product > Test, or pressing Cmd + U. After some seconds, you can see the results of your tests on the test navigator panel.
You can get the finished project in the following link: https://github.com/mran3/dragons
Final thoughts
Have in mind that Unit Tests power does not limit to automatizing basic checks to ensure quality. Making your project testable forces you to revisit old code, and use it differently because you need it to not only fulfill the original functional requirement but also to interact with the testing suite. This can help you refactor your code so it is not just testable, but also more extensible.