

While it is easy for a good reader to identify poorly written emails, articles, or even fiction works, paradoxically writing is one of those activities we all think we do just “good enough”. But even if you are conscious about improving your writing abilities, sometimes you don’t know where or how to start.
You could make a very thorough revision of a specific email or an article you are writing and think that is enough. While it is certainly helpful to double-check a particular text, you are analyzing just a piece, so this process does not really give you too much information about your overall writing style. What would be very helpful is to take a lot of pages written by some author (you for example), and in a detailed manner, underline what are the most used structures, and lexical units.
This could be a tiresome process because we usually read to get new information, not to identify hidden features of known texts. This is where the recent advances in artificial intelligence, and particularly in Natural Language Processing can come in handy.
There are multiple ways you can apply NLP for analyzing texts, in this way you can get new insights about known books or authors, or if you apply it to your own texts, you can use the collected information to improve your writing style.
In this introductory article to Machine Learning, we will code a macOS application that will identify the most used adjectives of a certain text. Using a limited vocabulary is one of the things that can result in a tiresome reading experience, so if we input a good sample of text, this could give us insights about the style of the text.
Prerequisites
- To be familiar with the Swift programming language.
- Know how to lay out UI components and create visual constraints (using storyboards, xibs, programmatically, or with SwiftUI).
- Basic general knowledge of programming for macOS or iOS platforms.
Note: You can get the completed project in https://github.com/mran3/MLAdjectives
Creating the basic structure
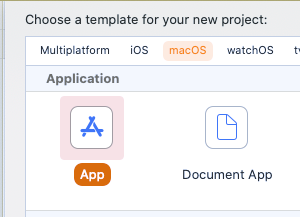
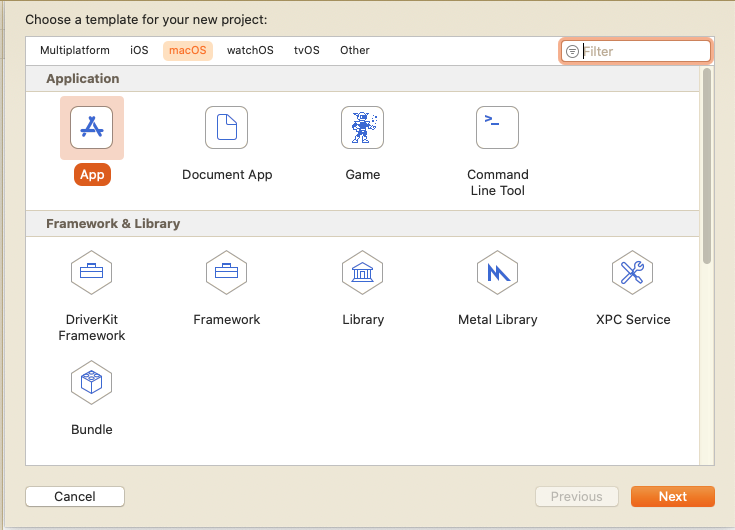
Let’s start by opening XCode and creating a new macOS App:
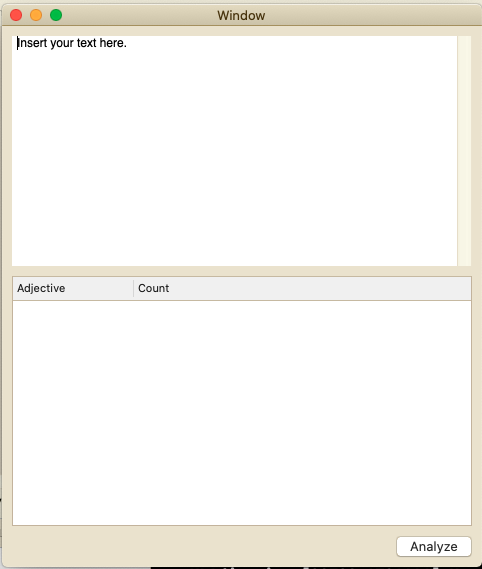
I have used the storyboard to create a starter project with the basic UI elements we will use. You can save some time downloading it here.
If you prefer, you can also create the UI yourself using another method (like doing it programmatically or using SwiftUI). To continue with the tutorial, you should have a user interface similar to the following one:
You might think working with Artificial Intelligence is super hard. But that is not always the case. Apple provides us with some really powerful pre-trained Machine Learning models that we just need to use without needing to train them or do any complex configuration.
Introducing an Intelligent Tagger
Let’s code what our analyzer will do once the Analyze button is clicked and you will see for yourself how simple it can be to use Machine Learning inside our Swift applications.
First, we need to create a NSLinguisticTagger object, it is a class that “provides a uniform interface to a variety of natural language processing functionality with support for many different languages and scripts.”
We can create a new NSLinguisticTagger with the following line of code:
let tagger = NSLinguisticTagger(tagSchemes: [.lexicalClass], options: 0)
It is important to pay attention to the tagSchemes parameter. This defines the kind of tags that our tagger will use, as we are interested in identifying the lexical parts of our text (the adjectives in particular), the lexicalClass scheme is enough.
Other possible values are:
.languagefor identifying in which language a text is written..lemmato get the stem form of a word, for example, the stem form of “Identifying” is “identify”, stem form of “your” is “you”, of “sentences” is “sentence” and so on….nameTypeto identify if the word is a Personal name, the name of an organization, or the name of a Place..scriptto identify the script (writing system) of the text according to ISO 15924. For example Latin or Simplified Chinese.
Let’s continue configuring our tagger:
tagger.string = text
let range = NSRange(location: 0, length: text.utf16.count)
let options: NSLinguisticTagger.Options = [.omitPunctuation, .omitWhitespace]
Here we just create a range comprising the whole text and set up our tagger to omit punctuation and whitespace.
Now we will instruct our tagger to do its job and enumerate each one of the tag it identifies with the following piece of code:
tagger.enumerateTags(in: range, unit: .word, scheme: .lemma, options: options) { tag, tokenRange, _ in
         if let tag = tag {
             let word = (text as NSString).substring(with: tokenRange)
              print("\(word): \(tag)")
         }
}
Presenting our results in a Table View
To show this results nicely ordered in the TableView I defined a simple struct representing a word row and declared an array of it:
struct WordRow {
    var adjective: String
    var count: Int = 1
}
class ViewController: NSViewController, NSTableViewDelegate {
    @IBOutlet var textView: NSTextView!
    @IBOutlet weak var tableView: NSTableView!
    var arRows: [WordRow] = [WordRow]()
...
Now, inside the closure of enumerateTags, let’s use only the adjectives, and order them by most repeated:
tagger.enumerateTags(in: range, unit: .word, scheme: .lexicalClass, options: options) { tag, tokenRange, _ in
            if let tag = tag, tag == .adjective {
                let word = (text as NSString).substring(with: tokenRange)
                let foundWordIndex = arRows.firstIndex { $0.adjective == word}
                if let foundWordIndex = foundWordIndex {
                    arRows[foundWordIndex].count += 1
            	} else {
         let newWordRow = WordRow(adjective: word)
           		         arRows.append(newWordRow)
            	}
        	}
}
At this point, we have everything we need to fill our Table View by implementing its methods numberOfRows and tableView viewFor: tableColumn, row:
 func numberOfRows(in tableView: NSTableView) -> Int {
        return arRows.count
}

 func tableView(_ tableView: NSTableView, viewFor tableColumn: NSTableColumn?, row: Int) -> NSView? {
        let text: String
        let cellIdentifier: String
        if tableColumn == tableView.tableColumns[0] {
        	text = arRows[row].adjective
        	cellIdentifier = "AdjectiveCell"
    } else {
        	text = String(arRows[row].count)
        	cellIdentifier = "CountCell"
    }
    if let cell = tableView.makeView(withIdentifier: NSUserInterfaceItemIdentifier(rawValue: cellIdentifier), owner: nil) as? NSTableCellView {
        	cell.textField?.stringValue = text
            return cell
    	}
        return nil
}
Remember to assign identifiers to your Cell Views, I used “AdjectiveCell” and “CountCell”.
You can set it to whatever you like.
Now, what we are missing is sorting our data and instructing the TableView to reload once the data is ready.
At the end of the method analyzeClicked, add the following.
arRows.sort(by: { $0.count > $1.count })
tableView.reloadData()
Now it is time to compile our application and put it to test. I pasted the whole text of David Copperfield and after some seconds of processing these were the results:
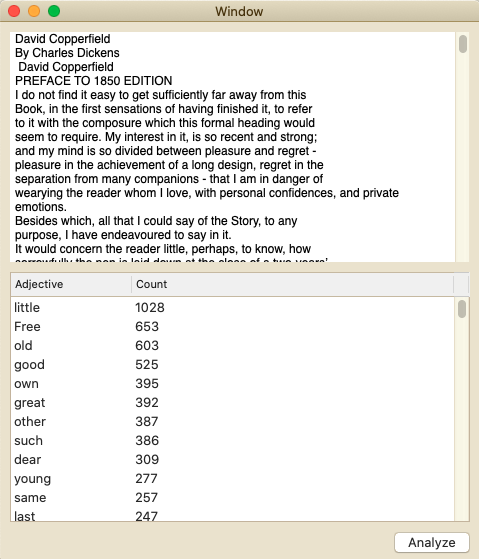
It seems Charles Dickens liked to write about little free things. Don’t you think?
Our AI-powered app is so smart that it does not work only with English, but with tenths of languages without changing anything. Imagine how complex would have been to code an algorithm that identifies adjectives in different languages by traditional means. Just have in mind that machine learning is not perfect, the computer has learned to identify certain patterns and structures instead of having the complete set of words and combinations for all languages (which would be nearly impossible). So from time to time, its results will not be perfect, in the same way that our own biological intelligence induces us to make mistakes from time to time.