

Introduction
Rasa is an open source machine learning framework for text or voice-based conversations. It can Understand messages, hold user interactions, and also connect to messaging channels like facebook, slack etc and other APIs.
In this article we will learn to create a virtual assistant using rasa open source framework. Our assistant will help users to answer questions related to a healthy lifestyle. Apart from greetings and goodbyes we will enable the assistant to answer questions like, what are good ways to lower stress? What is a healthy diet? etc.
Setting up the development environment
Python Environment Setup
The very first thing we should do is make sure python is installed. We can check this by opening terminal and running the command
python --version
So if you see that the command is not recognized or a different version, you need to install python.
Virtual Environment Setup
I strongly recommend isolating python projects using virtual environments. Tools like virtual env and virtualenvwrapper provide isolated Python environments, which are cleaner than installing packages system-wide (as they prevent dependency conflicts). They also let you install packages without root privileges.
For more information and installation instructions, check out the virtualenv page on pypi
Install Rasa Open Source
First make sure your pip version is up to date:
pip install -U pip
Create a folder to hold our project, let’s call it rasaproject.
To install Rasa Open Source:
pip install rasa
Once the installation is complete, we are going to create a new project by running the command:
rasa init
This command creates a basic starter project called mood bot. Mood bot can ask you, how you are feeling and if you are feeling OK it’s going to say cool, carry on. But more importantly when we create mood bot it gives us the folder structure and the files we need. We are going to train our model using the default data and then we can talk to the mood bot. So go ahead and say yes to all the prompts that you get during the execution of the above command.
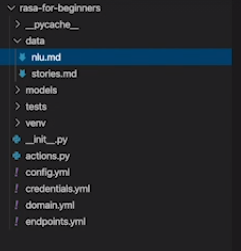
It creates the following files:
Any of the default CLI commands will expect this project setup, so this is the best way to get started. You can run the rasa train, rasa shell and rasa test without any additional configuration.
You can take a look at each of these files we have in our project, starting with the data folder.
The data folder holds the nlu.md and stories.md.
nlu.md file holds all of our nlu training data.
If we look into this file we are going to see intense mood, greet and so on.
Each intent is formatted with a double hash tag followed by the name and then underneath each intent name, we have a list of training examples.
These training examples represent all of the different ways a user might express the intent.
stories.md file holds the training data for the dialogue model.
Here we have a format that includes both the intent behind what the user says and the bot response.
A story is a bit like a conversation script because the model needs to learn what the assistant should say or do depending on what the user has said so far in the conversation.
We also have a domain.yaml file which contains a list of all of the intent, entities, responses and more that the assistant can recognize.
Domain file is like the world of your assistant because it defines everything that the bot knows or recognizes or does.
Then we have the config file where the new pipeline and the dialogue policies are configured. These are like recipes for how to train each machine learning model. We will mostly stick with the default settings as they will be sufficient for our assistant.
The actions.py file, currently this file is empty but that’s okay because that is where we are going to write our custom action code.
We can write python functions here that give our assistant additional capabilities, like posting to a database and so forth.
Our credentials.yaml file holds the authorization tokens for our external systems, we will use this file when we connect to Twilio in the next part.
Your endpoints.yaml file in the project lets RASA communicate with other services like the actions server.
A Rasa action server runs custom actions for our assistant.
And finally we have the test folder, this folder holds a file to evaluate how well the bot did.
Training Data
Now that we have the RASA setup done and also have the folder structure in place for our project, we can now start building our training data and I will teach you how to handle three new questions that are related to health.
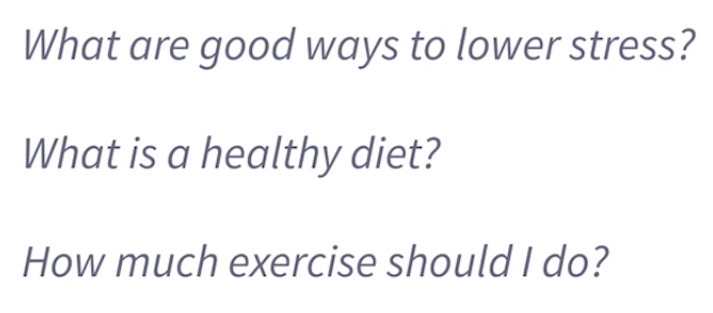
First let’s focus on training the assistant to recognize the three new questions we want to add. To do this we will add three new intents to the nlu.md file. An intent describes the meaning behind what the user has said.
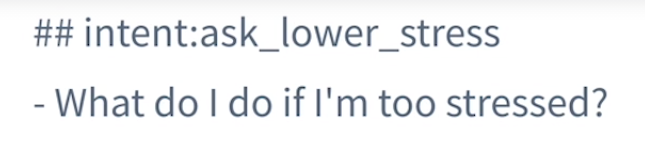
This is how we add an intent to our nlu.md file.
So for the question about how to lower stress, we could call the intent ask_lower_stress in the format shown and underneath we will add different ways that the user might phrase the question right a dash and space. Similarly we can go ahead and add for our other questions.
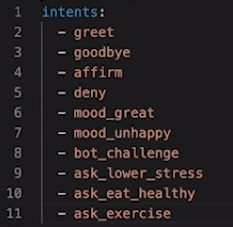
Now we will head over to our domain file and as I said it contains entries for all of the things our assistant can recognize. We need to list all the three intents that we just created in this file.
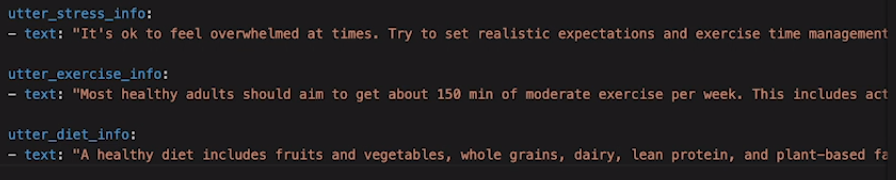
We will also need some response templates in this file so that the assistant will know what to say back one of these new questions. Like for example when the user asks to lower their stress, the bot should know what to respond back. The format for this is since the bot is going to respond it should start with utter, refer the pic below.
So when the assistant is going to see or detect the new intent like ask_eat_health, meaning the user has a question about healthy diets. We want the assistant to respond with a template we just wrote in the domain.yaml file. So we will accomplish this by writing stories in the stories.md file.
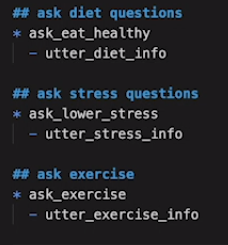
As we know stories are the training data for dialogue management models. The story format is like a script, we first show what the user said (expressed as the intent the model predicted) and then we show the bots action. The action could be an utterance (assistant’s reply) or it could be a custom action which is a custom code that you want to run. Now we will define a few stories which match the intents that we defined with the new utterances. So that the assistant knows the right way to answer each question.
Each story should start with a named label, you can name each story whatever you like. But for debugging purposes it’s a good idea to give descriptive names.
In your production environment you are going to have tons of stories, covering all the possible paths of a conversation between user and the assistant.
Train the Model
ow that we have updated our data, it’s time to re train the model, and this allows the model to learn all of the things we just added to the training data and the domain file.
Save all the files and run the rasa train command in your terminal. It’s going to take a couple of minutes to train your model.
rasa train
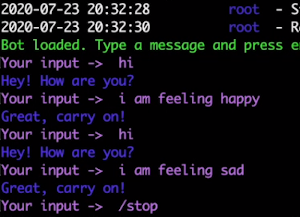
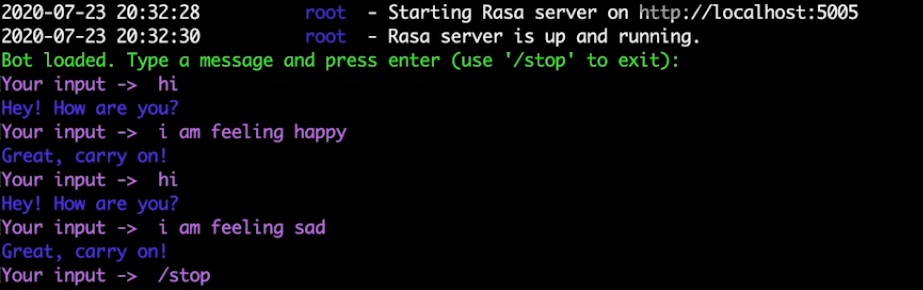
After the train we are going to start the rasa open source server by running the command rasa shell
rasa shell
This command will start the server and will also initiate a chat session.
When it does that you can talk to the assistant on the command line. Try asking the questions you have just added. Keep in mind you don’t need to ask the exact questions, the assistant is able to generalize and can understand questions that have similar meaning. The more training data you gather over time will definitely improve the assistant’s accuracy.

Conclusion
We have successfully created an assistant using rasa open source framework. We were able to create a few new intents for the assistant to understand and answer. This is now a good starting point for you to explore the framework further and try other features.