

Slack, Visual Studio Code, and Skype among others have shown us that writing performant eye-catching multi-platform apps with web technologies is not only possible but that they can compete with apps made using different frameworks as native libraries or Java.
Today we will create a basic app that allows reading a text file into a text area.
This functionality is at the core of several apps like word processors, and code editors among others.
Pre Requisites
A solid understanding of how HTML, CSS, and Javascript work together on a web page.
Ability to code on Javascript.
Node and Npm (or Yarn installed).
Know how to install node packages.
Installing Electron
Run
npm init
to initialize a new node application and fill the information requested in the terminal.
Then run
npm install --save-dev electron
Hello Electron
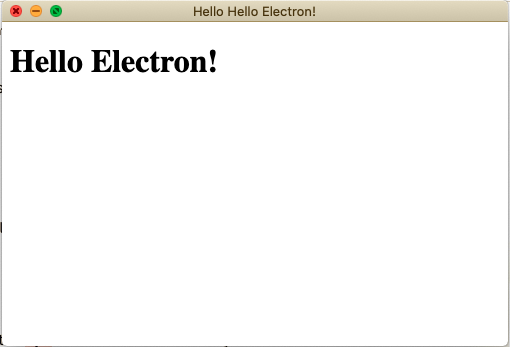
Now we will create a basic app that displays “Hello Electron” just to see the electron framework working.
Create a new main.js file and write the following on it:
// We need to use require instead of import because this code runs on a node environment.
const { app, BrowserWindow } = require('electron')

function createWindow () {
  // Create the browser window.
  const win = new BrowserWindow({
    width: 800,
    height: 600,
    webPreferences: { nodeIntegration: true }
  })

  // and load the index.html of the app.
  win.loadFile('index.html')
}

app.whenReady().then(createWindow)

// In this file you can include the rest of your app's specific main process
// code. You can also put them in separate files and require them here.
Now create a very simple index.html file:
<!DOCTYPE html>
<html>
  <head>
    <meta charset="UTF-8">
    <title>Hello Hello Electron!</title>
  </head>
  <body>
    <h1>Hello Electron!</h1>
  </body>
</html>
Now, let’s run the npx electron command on your shell to see our first electron app running.
This is very nice, but can give us the impression that Electron is just a wrapper that we use on our websites to convert them to desktop applications.
Once we add some more functionality to our app, we will see that there are specific Electron topics that we need to take care of in order to create a useful piece of software.
Electron File Loader
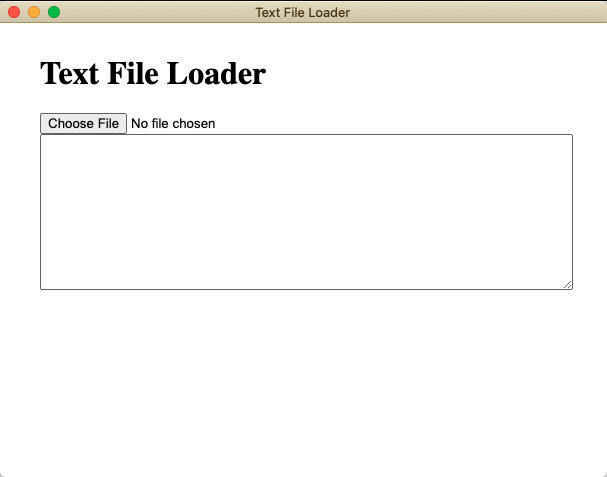
Let’s change our HTML so we have an input file control and a textarea element:
<!DOCTYPE html>
<html>

<head>
  <meta charset="UTF-8">
  <link rel="stylesheet" href="styles.css">
  <title>Text File Loader</title>
</head>

<body>
  <main>
    <h1>Text File Loader</h1>
    <form action="">
      <input type="file" name="fileLoader" id="fileLoader">
      <textarea name="loadedText" id="loadedText" cols="30" rows="20"></textarea>
    </form>
  </main>
</body>

</html>
We will also need some simple CSS style, so create a new file called styles.css and put the following content on it:
main {
    margin: 2rem;;
}
textarea {
    width: 100%;
    margin: auto;
    display: block;
}
At this moment, when you run your app it should look something like this:
We have the visual elements, now we need to make them interactive with Javascript. For this, we need to call a script inside our HTML using the script tag. Put it at the end of the file, just after closing the body tag:
</body>
<script type="module" src="./renderer.js"></script>
Of course, we need to create this new renderer.js file. There we will add an event listener to detect that a file has been selected by the user:
document.getElementById("fileLoader").addEventListener("change", fileSelected);
Now, the code for the event handler:
const { ipcRenderer } = require('electron');

async function  fileSelected(e){
    const loadedFilePath = e.target.files[0]?.path
    let data = await window.electron.ipcRenderer.invoke('read-file', loadedFilePath)
}
This kind of function should be familiar if you are a web Javascript developer, except for this line:
let data = await window.electron.ipcRenderer.invoke('read-file', loadedFilePath)
Usually, the code of Electron apps runs in two different isolated contexts:
The rendered context is the JavaScript code that is interpreted by a WebView provided by Electron and the main context is a node environment where you can make use of some native desktop functionalities (like loading files from the filesystem).
ipcRenderer is an EventEmitter. It provides a few methods so you can send synchronous and asynchronous messages from the render process (web page) to the main process.
We are sending the ‘read-file’ message, but we need another piece of code to receive this message, right?
Of course! That is what the next code is about, write it into your app.js file:
ipcMain.handle('read-file', async (ipcEvent, path) => {
    if (path != undefined) {
        console.log('Load: ' + path)
        //Here we will add the necessary code for loading the file.
    }
})
Don’t forget to require ipcMain from electron at the beginning of the main.js file
const { app, BrowserWindow, ipcMain } = require("electron");
If you check in the console (your terminal as the handle is executed in the main context).
You will see that it prints out the name of the file that we have selected.
Loading and returning the file contents is a two-liner using promises along with async and await:
ipcMain.handle('read-file', async (ipcEvent, path) => {
    if (path != undefined) {
        console.log('Load: ' + path)
        let loadedText = await fs.readFile(path, 'utf-8')
        return loadedText
    }
})
Don’t forget to require the promise ready version of the
fsmodule at the beginning of main.js .
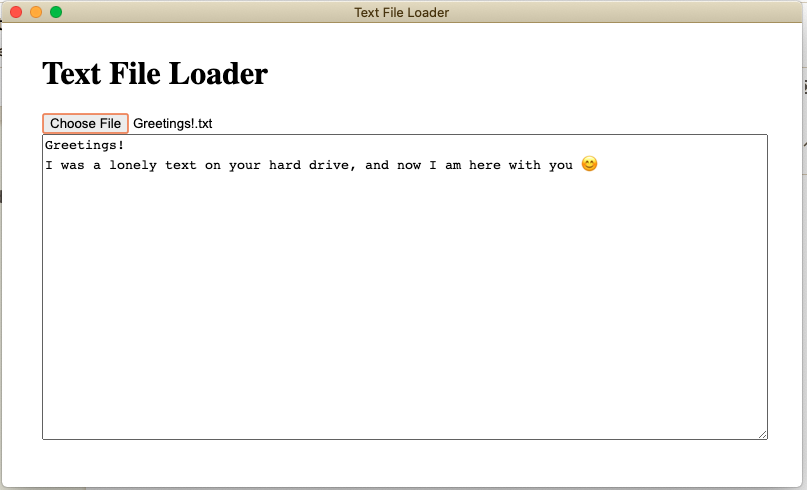
Now that we have our data, let’s go back to our renderer.js file and show them in the text area adding the following line to our fileSelected function:
async function fi
<a href="/electron-1/text-file.png" target="_blank"><img src="/electron-1/text-file.png" alt="electron text file loader" class="screenshot"></a>leSelected(e){
    const loadedFilePath = e.target.files[0]?.path
    let data = await ipcRenderer.invoke('read-file', loadedFilePath)
    document.getElementById("loadedText").value = data
}
Voilà! You have coded a simple but functional app with Electron.
You can check out the source code of this example on:
https://github.com/mran3/Text-File-Loader