

Jenkins 2
Jenkins is an open source automation server. Many companies use it for continuous integration and continuous delivery.
Version 2 was released not long ago, it includes Pipeline as code, some ui improvements and a new setup experience.
While ui and ux is important, the most interesting part of this release is Pipelines as code.
Don’t get me wrong - I think that Jenkins’s ui is horrible and needs to be improved, but having your build configuration in scm is very very important.
About Pipelines
Pipelines are defined with DSL, which is actually a “domain-specific language” (it’s code).
As developers, defining stuff in code is easier to understand, maintain and share - good.
Code can be stored in git, svn or whatever - very good.
DSL is another language and we don’t want to have to learn more syntax - not so good.
Pipelines are durable and can survive the server crashing.
Always good.
Pipelines are simple and easy to implement.
Huge plus. If your build process is not too complicated, so is your pipeline.
To sum up, I think that Pipelines as code is a good answer to newer automation servers such as concourse ci.
Feel like kicking the tires already? Good! Let’s setup Jenkins and create a Pipeline.
Prerequisits
I’ll assume you are familiar with Jenkins.
You need to have docker and docker-compose installed.
In case you are missing one of those:
Setting Up Our Jenkins Environment
I prepared a docker setup for this example at https://github.com/asafg6/jenkins2-docker-setup, so all you need to do is:
$ git clone https://github.com/asafg6/jenkins2-docker-setup
$ cd jenkins2-docker-setup
$ docker-compose up
It may take a while for docker to download all it needs and build the images.
What Are We Building?
We are building a sample Go + Angular app. The Angular part is just the starter app and the Go part is a one file webserver. The app itself doesn’t do anything, but in order to build a Pipeline we need something to build.
Installing Jenkins
Once docker-compose is done, point your browser to http://localhost:8080. You should see something like this:
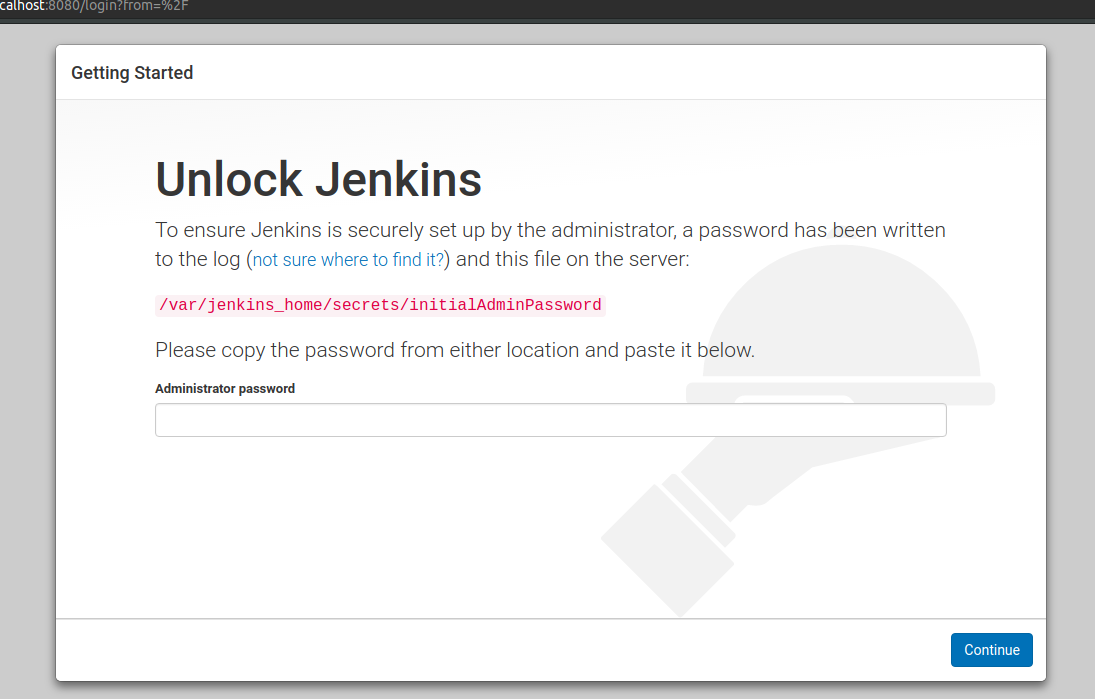
You can get the initial password from the shared folder like this:
$ cat master/home/secrets/initialAdminPassword
Copy and paste the admin password into Administrator Password text field.
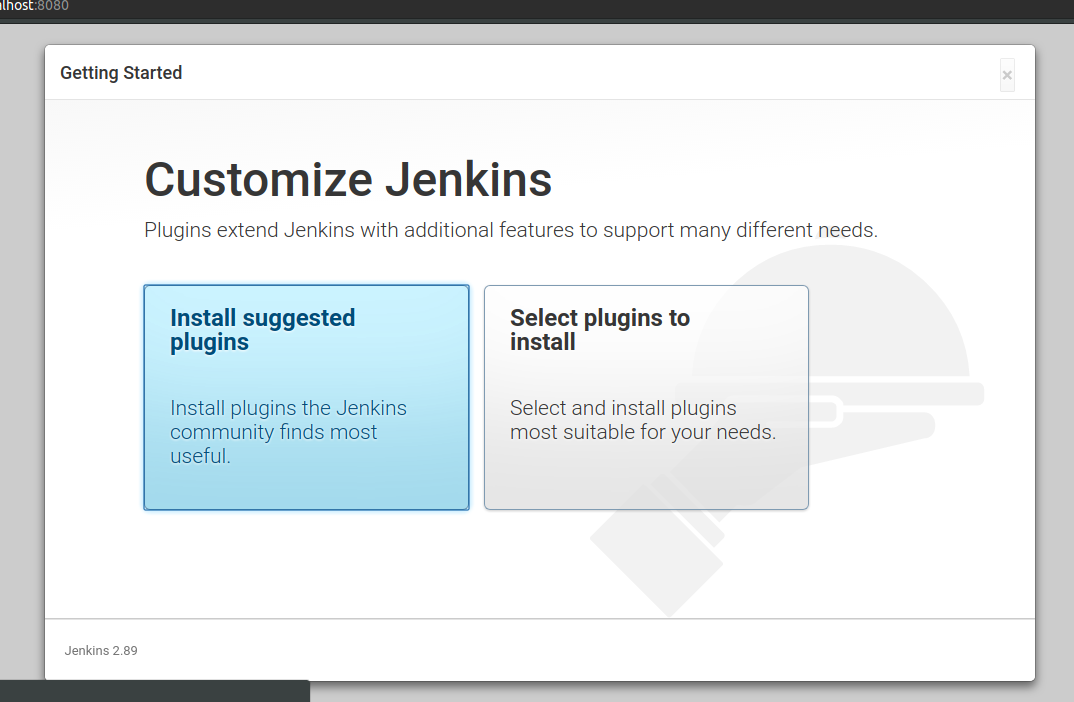
In the next screen you will be asked to choose how to install Jenkins, click on “Install suggested plugins”
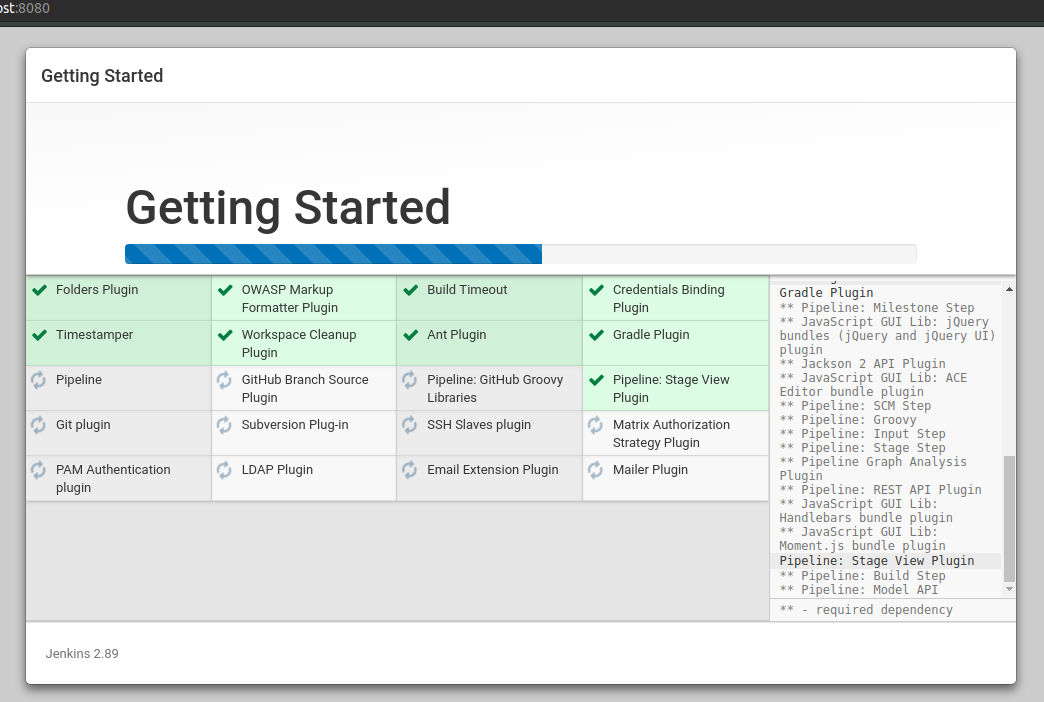
Wait for Jenkins to complete the installation.
Then create your user and click on “Save And Finish”.

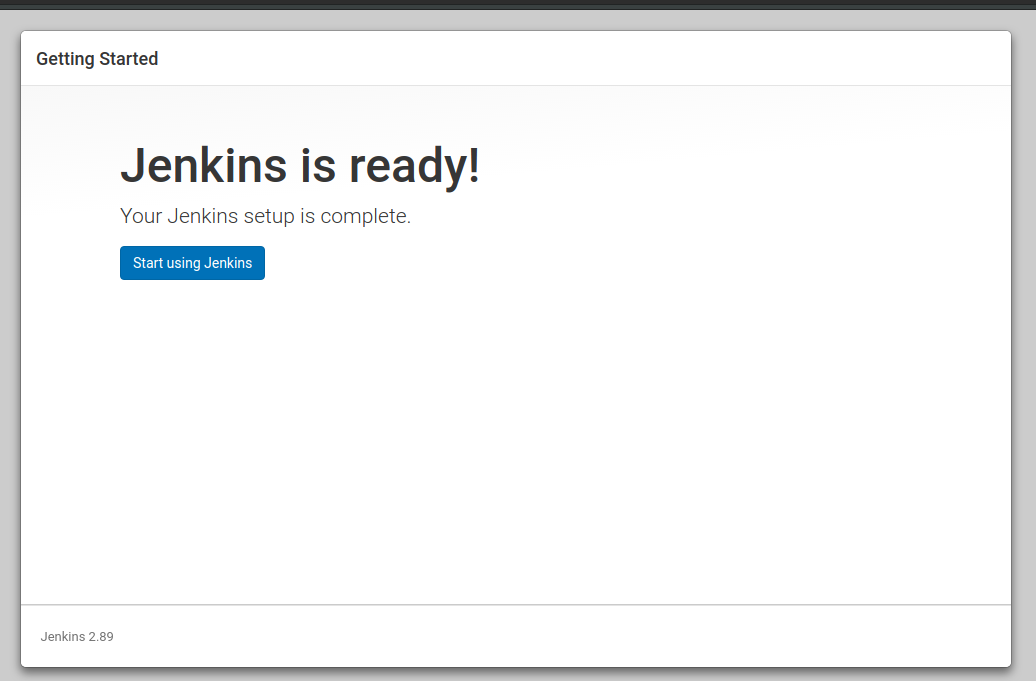
Jenkins will tell you it’s ready, click on “Start using Jenkins”.
Alright!
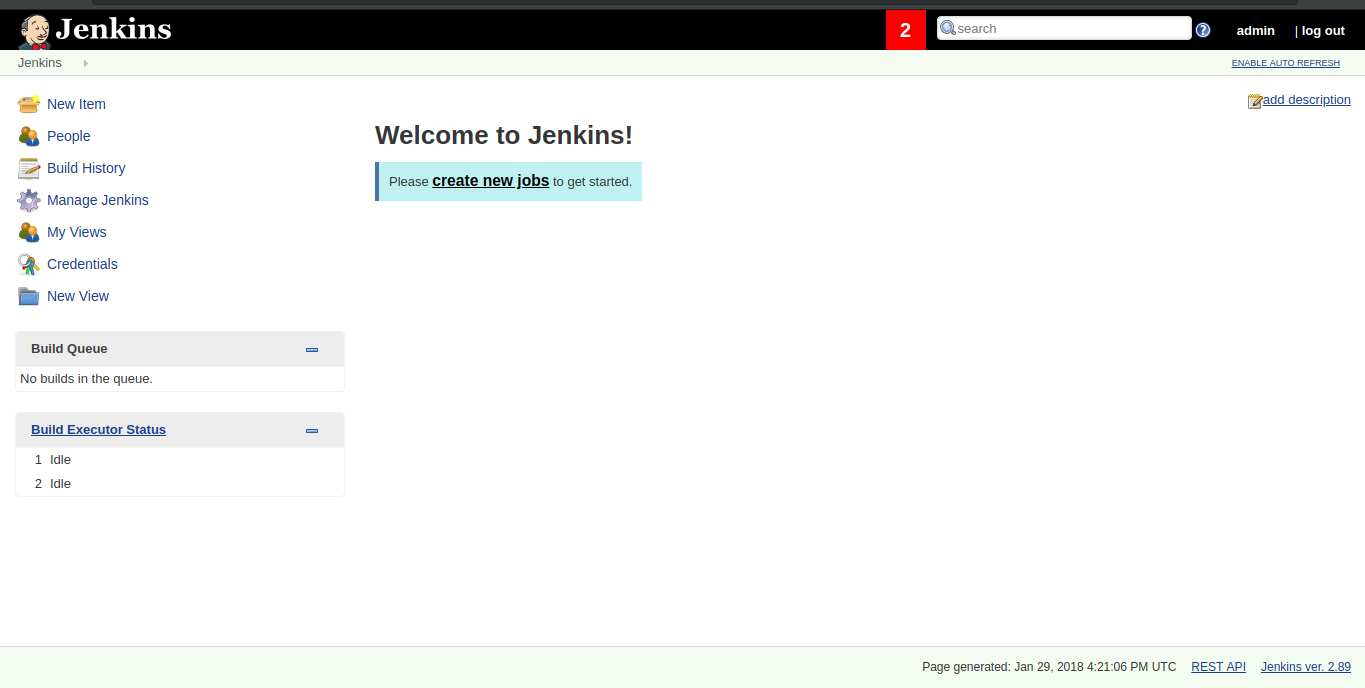
Connecting Jenkins To Build Nodes
Now that we have a fresh Jenkins server, let’s add our build nodes.
Our first build node, would be “slave1” from our docker-compose. It has Go installed on it and we will use it to build are sample go application.
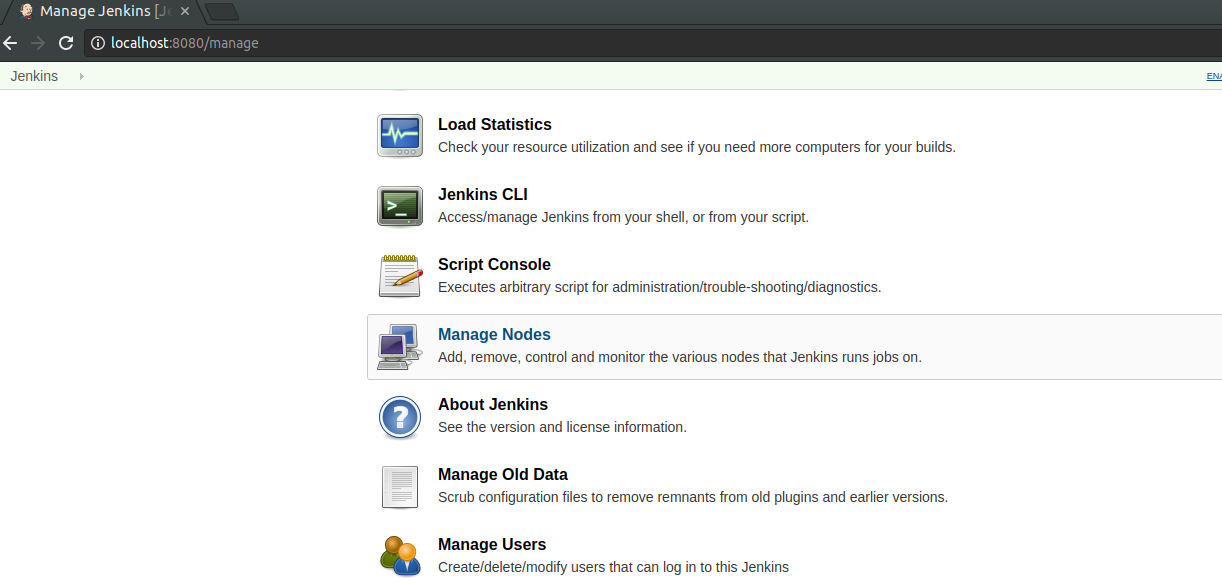
Click on “Manage Jenkins” and in the following menu on “Manage Nodes”.
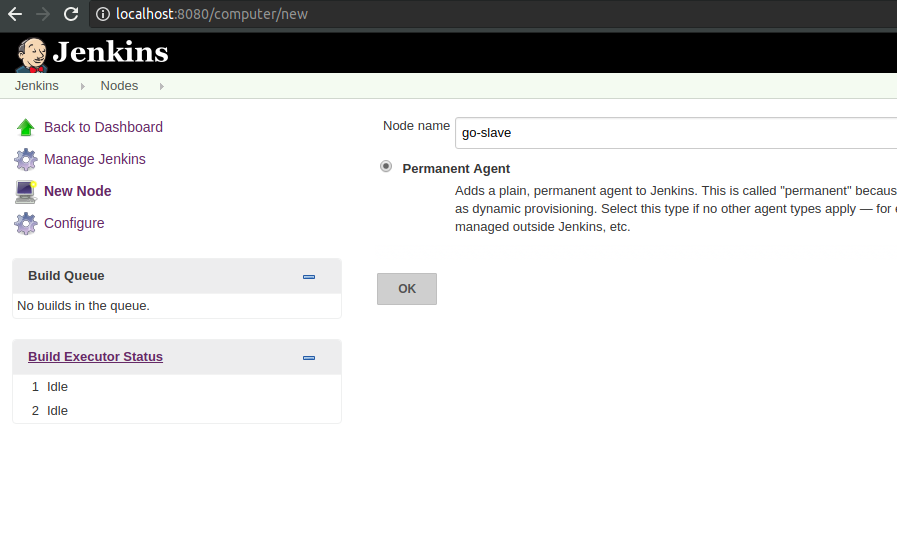
Click on “New Node”, give it a name, choose “Permanent Agent” and click “OK”.
Now you should be in the Node configuration screen.
In “Remote root directory”, enter “/home/jenkins”. It is the path I configured on the docker machine.
In “Labels”, enter “go” so we can choose to use this node via it’s label.
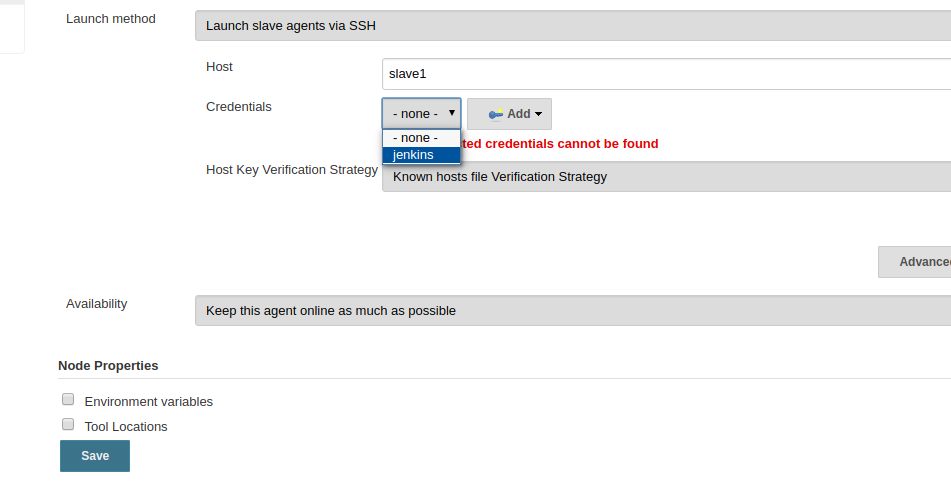
In “Launch method”, choose “Launch slave agents via SSH”.
In “Host”, enter “slave1”.
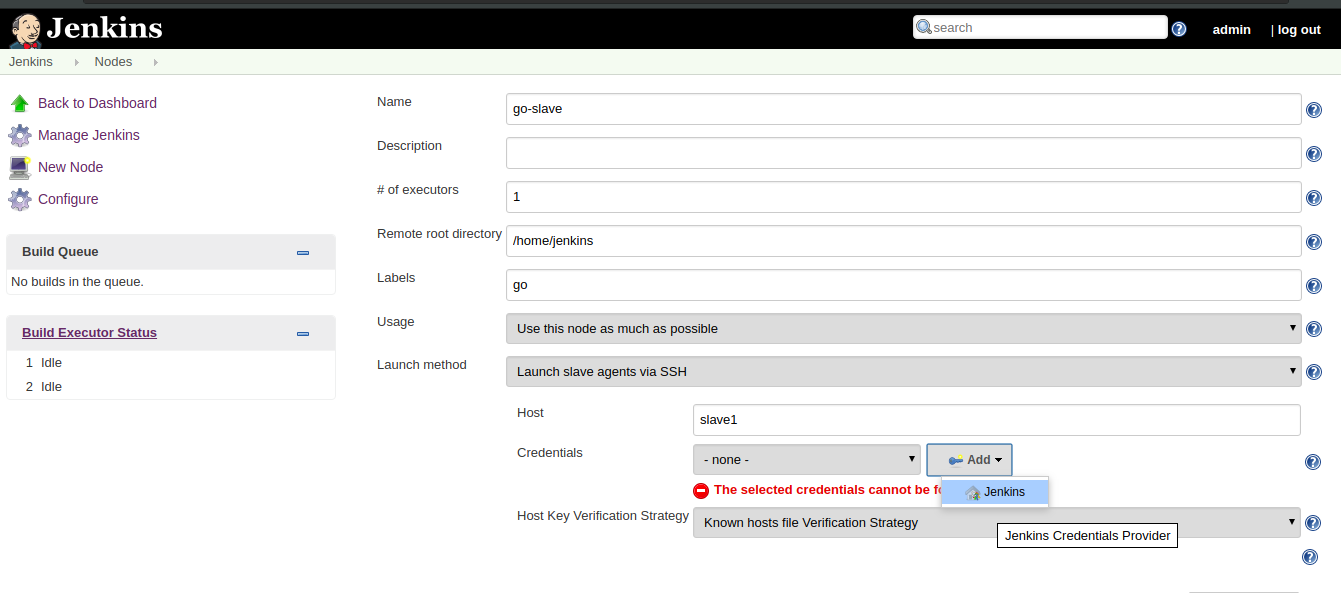
In “Credentials”, click “Add” and “Jenkins”. A screen will open with the title “Jenkins Credentials Provider: Jenkins”.
In “Kind”, select “SSH Username with private key”.
In “Username”, enter “jenkins”.
In “Private Key”, select “From the Jenkins master ~/.ssh” and click “Add”.
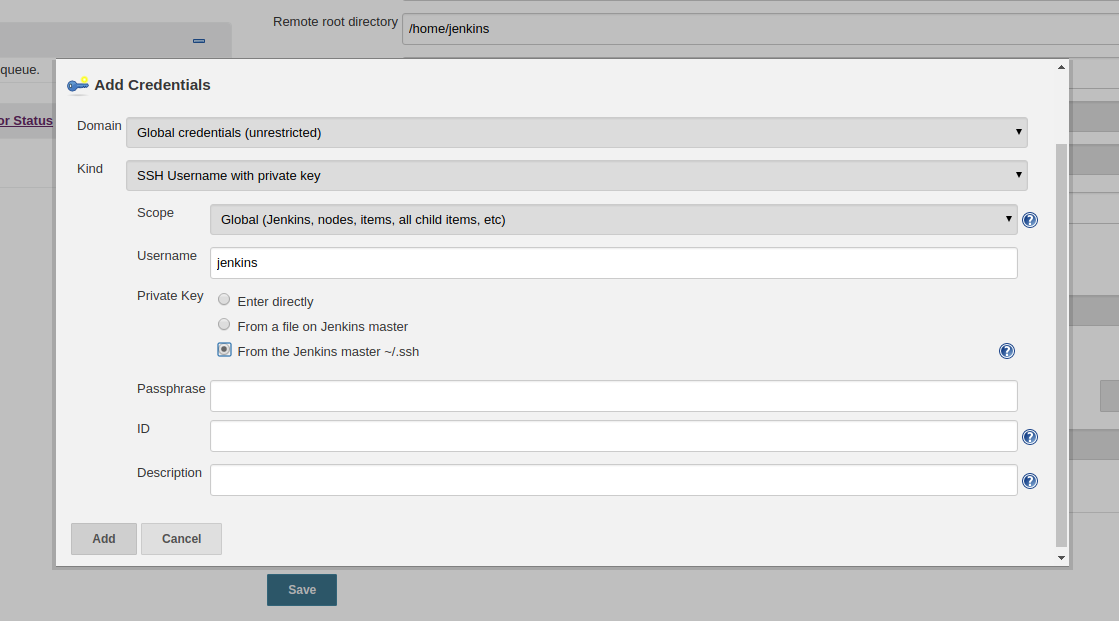
Then, in “Credentials”, choose “jenkins” and click “Save”.
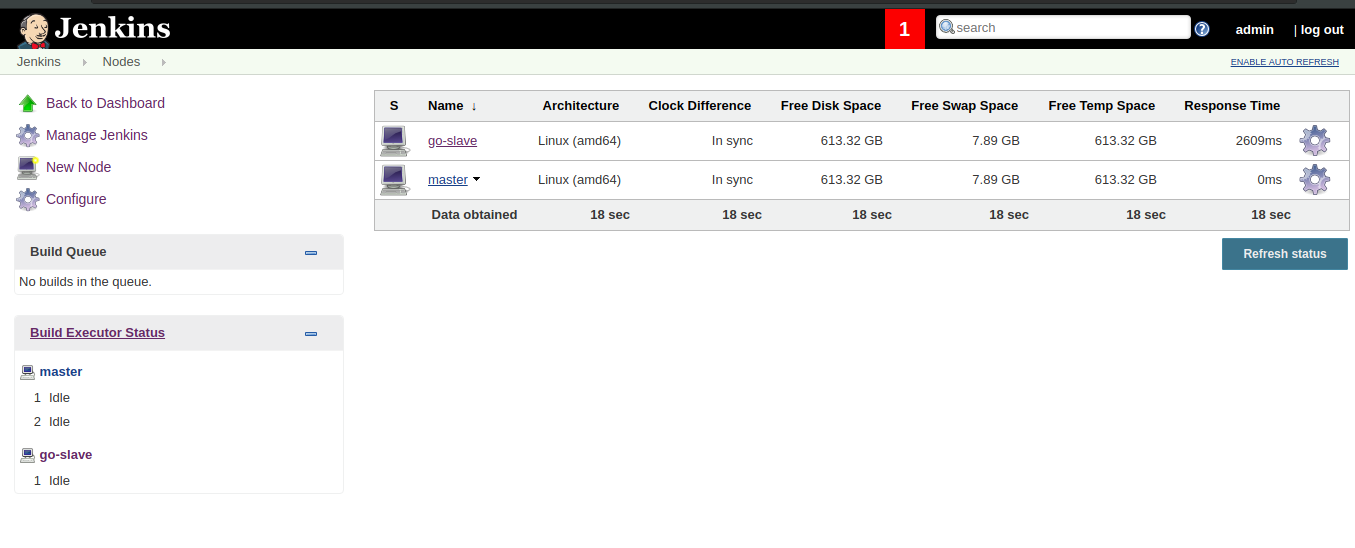
After a minute or so, the new node would appear as active on the node list.
We are now going to repeat this process for our second build node.
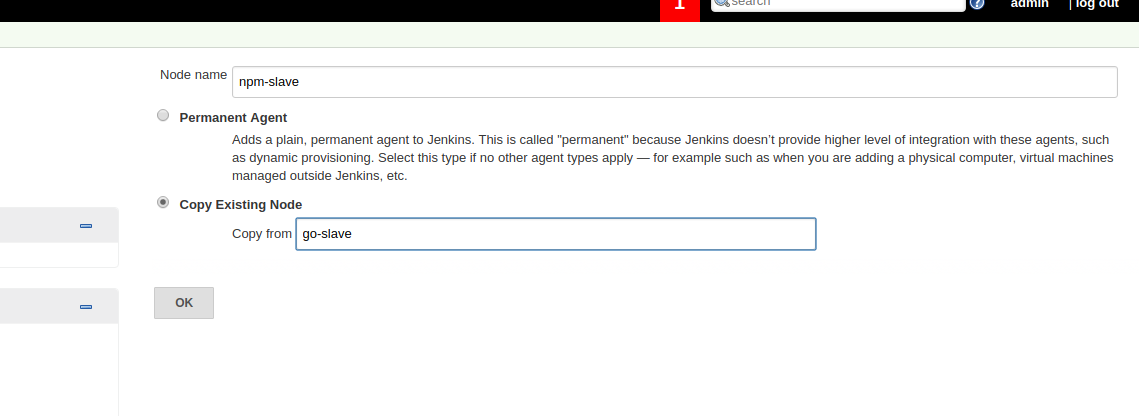
Click on “New Node".
We can save ourselves some trouble by copying the configuration from the first node.
Give the new node a name, choose “Copy Existing Node” and enter the first node’s name.
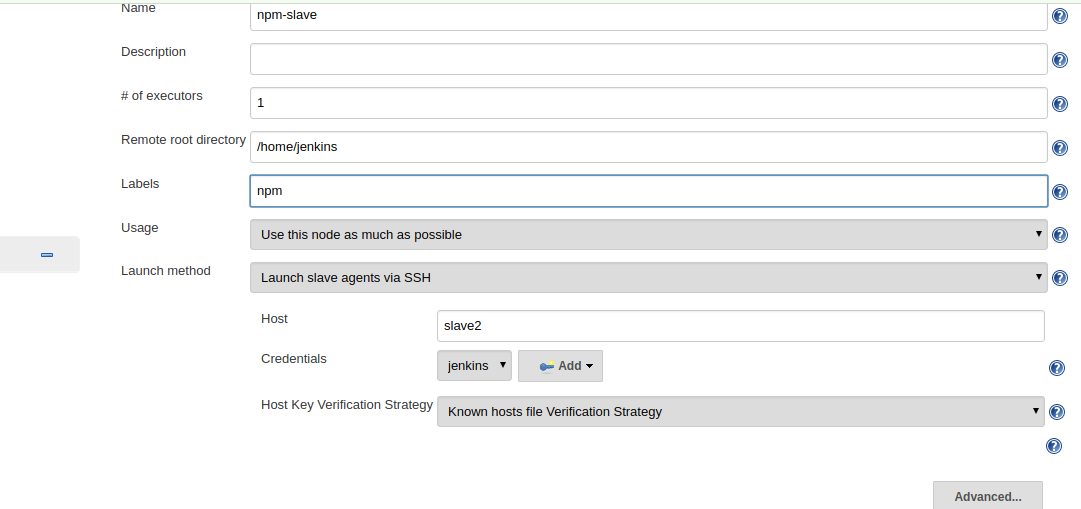
In the node configuration screen, change “Labels” to “npm”, “Host” to “slave2” and click save.
After a minute or so, your nodes screen should look similar to this.
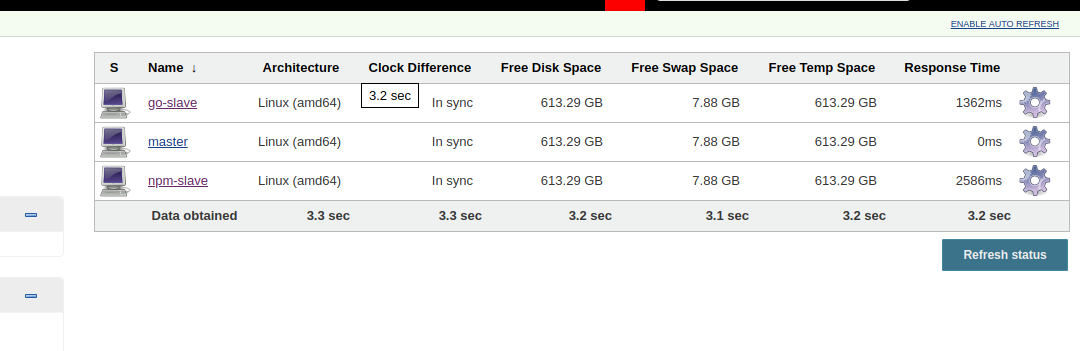
Finally, our environment is ready for use.
The Pipeline Code
Our Pipeline and the sample app are ready at https://github.com/asafg6/jenkins2-pipeline-npm-go-example.
Let’s take a look on our Pipeline code.
Jenkinsfile
pipeline {
    agent none
	stages {
        stage('Build') {
            parallel {
                stage('Build Go') {
                    agent { label "go" }
                    steps {
                        sh 'bash build_go.bash'
                        stash includes: '**/go-app/main', name: 'go-app'
                    }
                }
                stage('Build Angular') {
                    agent { label "npm" }
                    steps {
                        sh 'bash build_angular.bash'
                        stash includes: '**/angular-app/dist/**', name: 'angular-app'
                    }
                }
            }

        }
        stage('Package') {
            agent { label 'master' }
            steps {
                dir("$WORKSPACE/my_app"){
                    unstash 'go-app'
                    unstash 'angular-app'
                }
                sh 'tar -czvf app.${BUILD_ID}.tar.gz my_app'
                archiveArtifacts "**/*.tar.gz"
            }
        }
    }
}
We can see here, that our Pipeline has two main stages - “Build” and “Package”.
The Build Stage
The Build stage is divided to two stages - “Build Go” and “Build Angular”. We tell Jenkins that we want these stages to happen concurrently using the parallel keyword.
...
            parallel {
                stage('Build Go') {
                    agent { label "go" }
                    steps {
                        sh 'bash build_go.bash'
                        stash includes: '**/go-app/main', name: 'go-app'
                    }
                }
                stage('Build Angular') {
                    agent { label "npm" }
                    steps {
                        sh 'bash build_angular.bash'
                        stash includes: '**/angular-app/dist/**', name: 'angular-app'
                    }
                }
            }
...
In the “Build Go” stage we use the agent keyword with the { label “go” } configuration.
This our way of telling Jenkins that we want to run this stage on a node that has the “go” label.
The same is configured on the “Build Angular” stage, but with the “npm” label.
In the steps part, we use sh to execute a shell command. The “Build Go” stage calls the go app build script and the “Build Angular” step calls the angular build script.
The second step is stash. We can use stash to save files for later use. The files will be available on any node.
To sum up:
- stage “Build Go” would run on the Go node we created and “Build Angular” would run on our npm node.
- Both stages will execute a build script
- Both stages will save their output files to stash.
The Package Step
After building our app, we will package it to a tar.gz file. Let’s see how it’s done.
...
            agent { label 'master' }
            steps {
                dir("$WORKSPACE/my_app"){
                    unstash 'go-app'
                    unstash 'angular-app'
                }
                sh 'tar -czvf app.${BUILD_ID}.tar.gz my_app'
                archiveArtifacts "**/*.tar.gz"
            }
...
We configure the step to run on our master node, using agent { label ‘master’ }.
The first step gets our files from both of the stashes and puts them in “$WORKSPACE/my_app”. $WORKSPACE will be replaced with the workspace directory in run time.
The second step executes a shell command to compress our output files. $BUILD_ID will be replaced with the build number at runtime.
Finally the last step uses the archiveArtifacts keyword, that tells jenkins to archive the artifacts for later use/download.
Setting Up A Pipeline Job
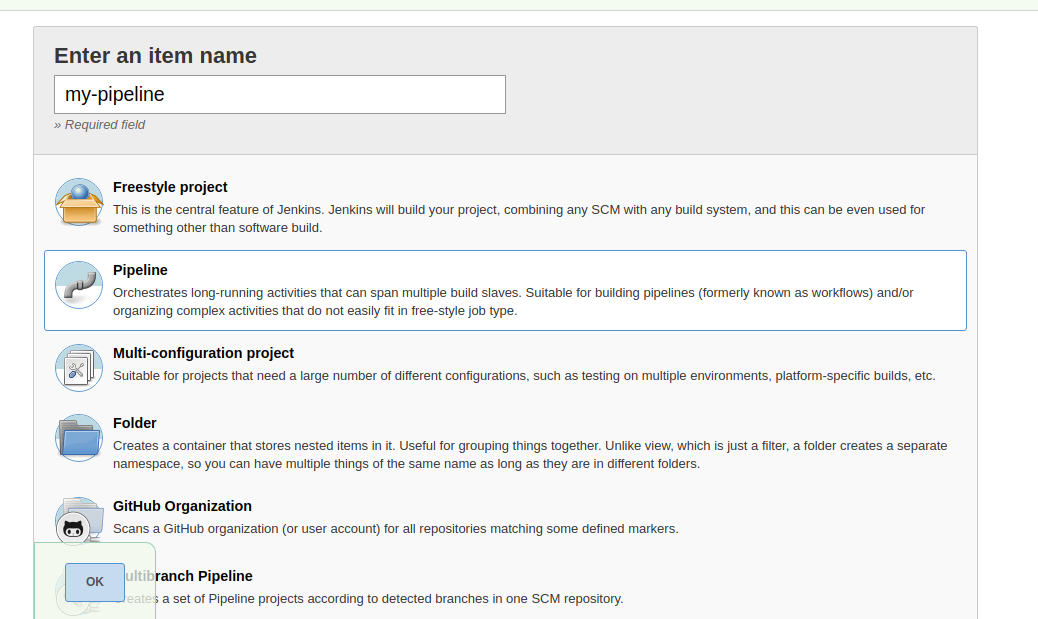
In the Jenkins dashboard, click “New Item”. A “new job” screen will open, give your new job a name, choose “Pipeline” and click “OK”.
Once you click OK, the job configuration screen will open. There are many options here, but since we are focusing on pipelines scroll down to the “Pipeline” section.
In “Definition” choose “Pipeline script from SCM”.
In SCM choose “Git”.
Under “Repositories” in “Repository URL” enter “
https://github.com/asafg6/jenkins2-pipeline-npm-go-example" and click save.
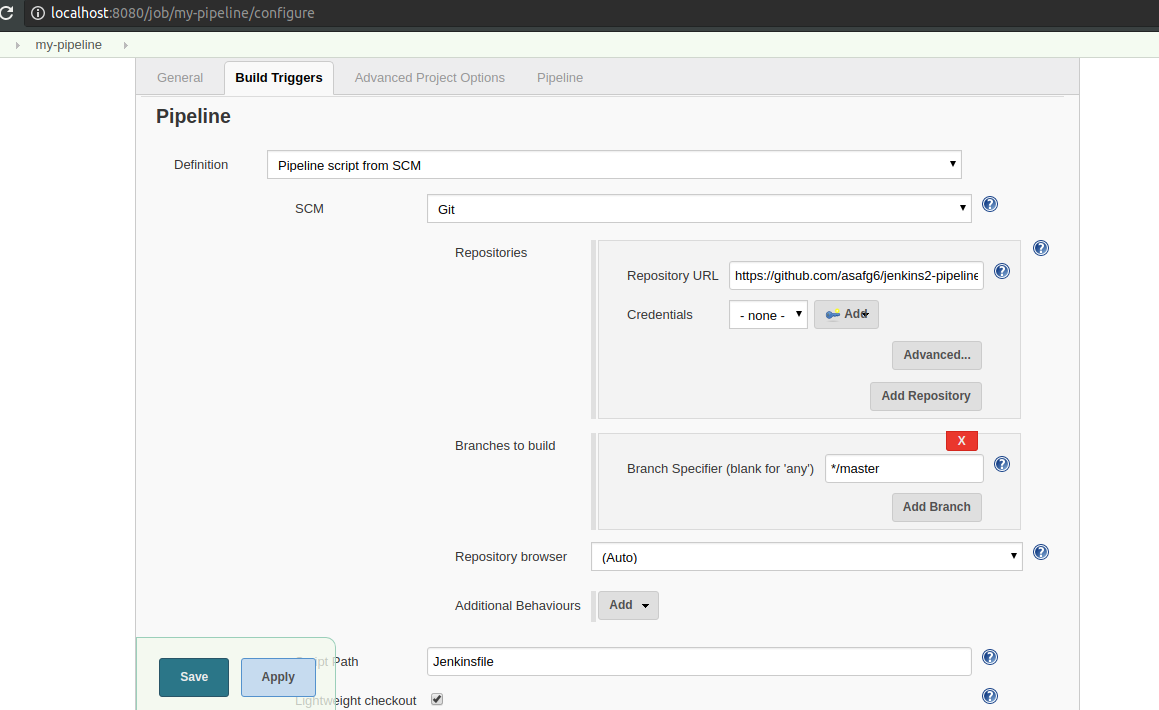
Basically, all we had to do is give Jenkins our repository url. Simple, nice.
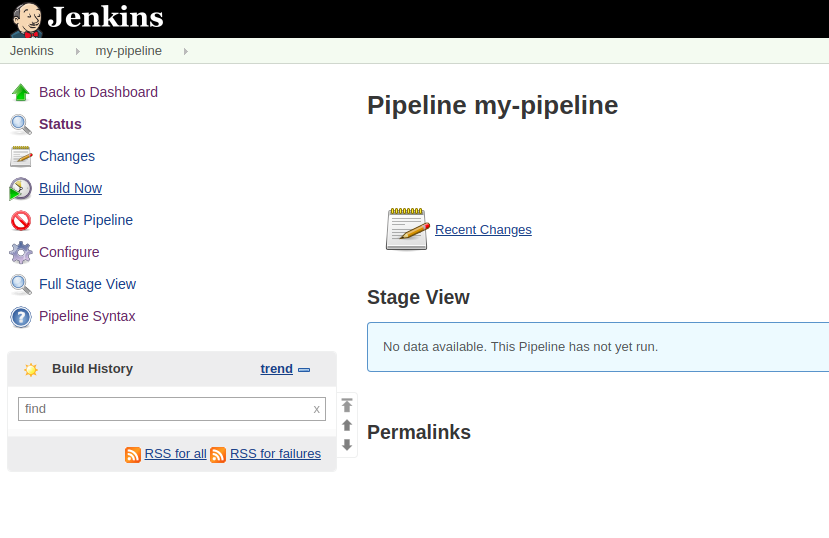
Running Our Pipeline
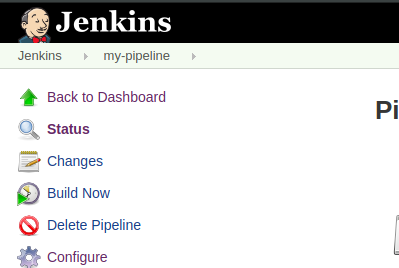
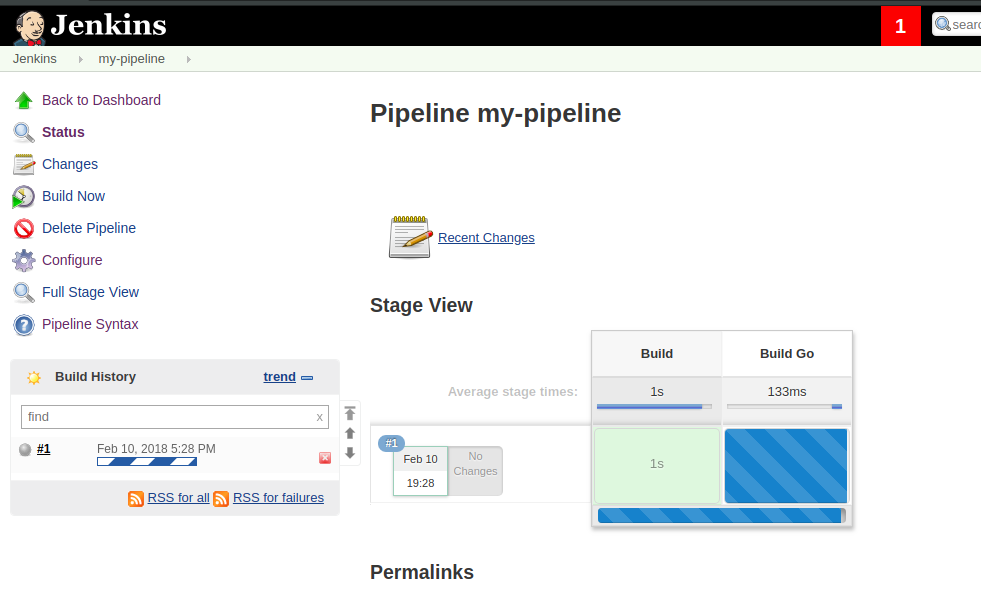
In the job screen click “Build Now”.
The build should initiate and look like this.
After a few minutes the build will finish and you can download the new archived artifact. Note that you might need to refresh the page in order to see the artifact.
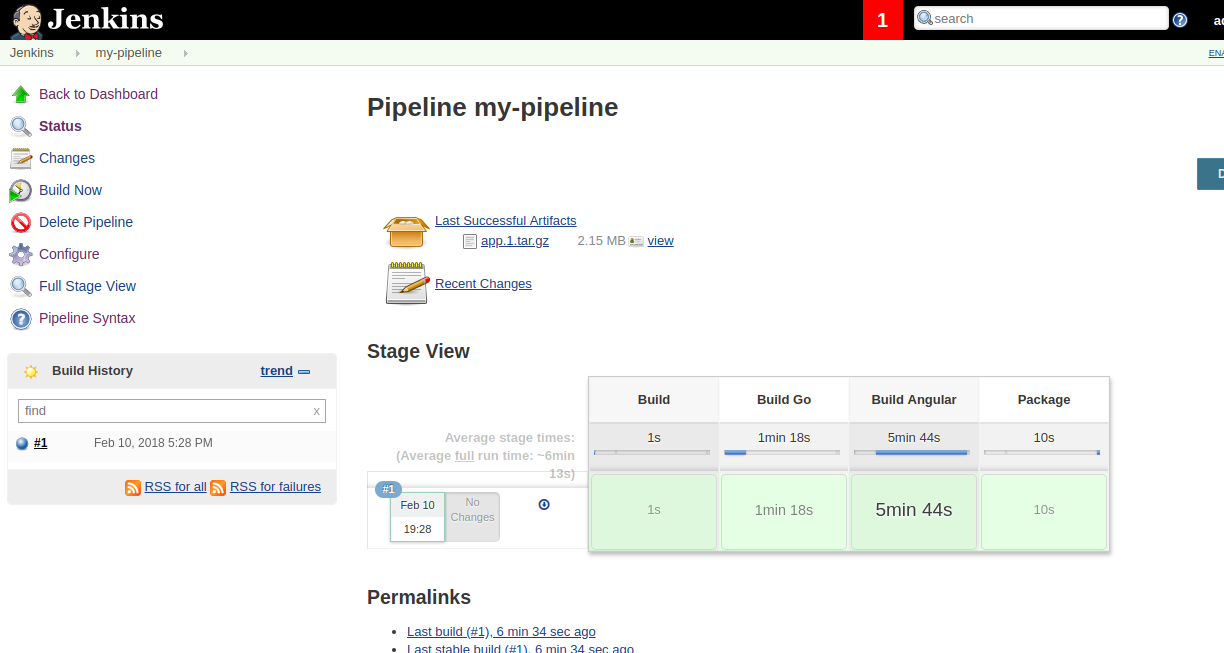
That’s it! Jenkins built our sample app using a Pipeline.
Summary
Having your build configuration written in code, enables you to change it without touching Jenkins.
This makes it easy to add test, deploy or whatever stages you want alongside all the benefits of SCM.
I hope you enjoyed, and of course, feel free to comment or share.
Thank you for reading.